Wooden Toy Car Project
Part 1 - Mark out
This project is made using off cuts of 18mm ply for the body & 15mm ply for the side wings. Overall, the car body is 210mm long x 65mm and the wings are 230mm long x 50mm. The wheels of the wooden toy car are approximately 50mm in diameter. This project is designed for younger children, under constant adult supervision.
Firstly, sketch out the body of the car first and then cut it out to help sketch up the side wings. Next, offer the two templates up together to see how the finished wooden car would look.
Once happy with the look and position of the two templates, it's now time to mark up the plywood. Here, you will need two side wings and two car bodies marked up.
Part 2 - Cut out and first glue up
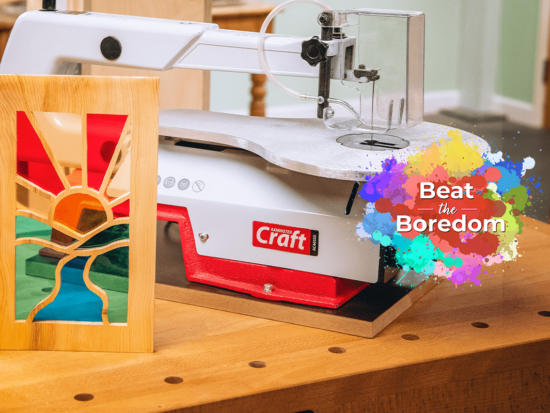
Here we recommend that you cut out the templates on a scroll saw for the best cut. However, it is possible to cut by hand although this may be fairly time consuming. Either way, be careful to follow the marked out lines. You need to cut two car bodies which will need to be glued together later and two side wings.
Next, use a good quality PVA glue to bond the two car body parts together to form a thicker car body. Make sure to align all edges the best you can as this will save time and effort sanding up later. Clamp in position and leave for at least an hour while you work on the other cars parts.
Part 3 - Shape the wings and cut the wheels
Now, it is time to sand the wings to round over the top edges. You also want to remove any saw marks. Here, the bottom edges and underneath the wheel arches were left pretty much square.
Next, mark out the wheels. Either mark out 4 x 50mm diameter circles and carefully cut them out on the scroll saw. Alternatively, use a hole saw in a drill to cut out the wheels. In our example, we found that the hole saw option produced a more accurate circle with less sanding required. It also left a hole in the middle for the dowel to make an axle.
Once all of the above is cut, enough time will have passed for the glue to dry on the car body. With this in mind, remove the clamps and sand over any misaligned edges.
Wooden Toy Car Project - the last stages!
Part 4 - Final sand up, glue up and fit the wheels
It is now time to sand up all edges. This is to ensure that there are no sharp edges or splinters. At this point, you may decide to add some colour to the parts such as a darker wood colour on the wheels, for example.
Before you glue the side wings to the body, mark out where the wheels will go. Ensure that the underside of the wooden toy car is flat. Also that the wings have equal overlap front and back.
Next, place the wheels in the arches and make sure that the wheels look central. They also shouldn't make contact with the top of the arch. Now, use a pencil or bradawl to mark where the axle will be.
Drill through the body of the car with a 6mm lip and spur drill using a pillar drill or cordless drill.
Once the axle hole is drilled, the side wings can be glued to the body in the same position as when the wheels were marked.
For reference, the wheel axles are made using 6mm dowel for the axle and 20mm dowel for the hubs.
Firstly, it is time to make the hubs. Sand over the end of the 20mm dowel, then carefully cut off an 8 - 10mm length. This will need to be done four times.
Next, mark up the centre of the flat side of the hub. Drill a 6mm hole but do not go all of the way through- only go around 4-5mm deep.
Once all of the main body glue is dry, you can then fit the wheels. Put a spot of glue in the blind hole in the hub and push in the 6mm dowel. Next, thread a wheel on to the dowel and feed through the body of the car. Add on the other wheel and cut off the 6mm dowel allowing just enough to fit in to the other hub. Here, glue only the hub in place and repeat on the other axle.
Your wooden toy car project is now complete!
Win a £25 Gift Card…
For a chance of winning at £25 Axminster Gift Card, simply show us what Beat The Boredom projects you’ve completed by uploading them to Instagram, Facebook or on to our Community Forum.
Snap It
Take a photo of your project.
Tag It
Use the #BeatTheBoredom hashtag and upload it to one of the following;
Discover more…
If you’ve enjoyed reading this article, keep an eye out for our next woodworking project for kids as part of our Beat The Boredom series. Watch this space for more details! Furthermore, why not take a look at all of our previous projects below?
Stuck at home with the kids? Looking for something fun to do? We have the answer with our online Beat the Boredom Series. A great way to get the children involved in a variety of...
Get connected!
If you’re searching for Beat the Boredom projects, you’ll find them on the Knowledge website. Alternatively, follow us on Instagram and Facebook to stay up to date on all the latest from our Beat the Boredom series. Connect with us using #BeatTheBoredom to @AxminsterTools.


do you have a printable plan for this?