How To Make a Wooden Tie Rack
Need somewhere to store your ties? We’ve got you covered. A super gift for the messy person in your life, this classic wooden tie rack will display your favourite selection of ties beautifully.
What you'll need
How To Make A Wooden Tie Rack
A space saving device that will keep your ties neat and tidy so you’re able to find them easily. What’s not to love?
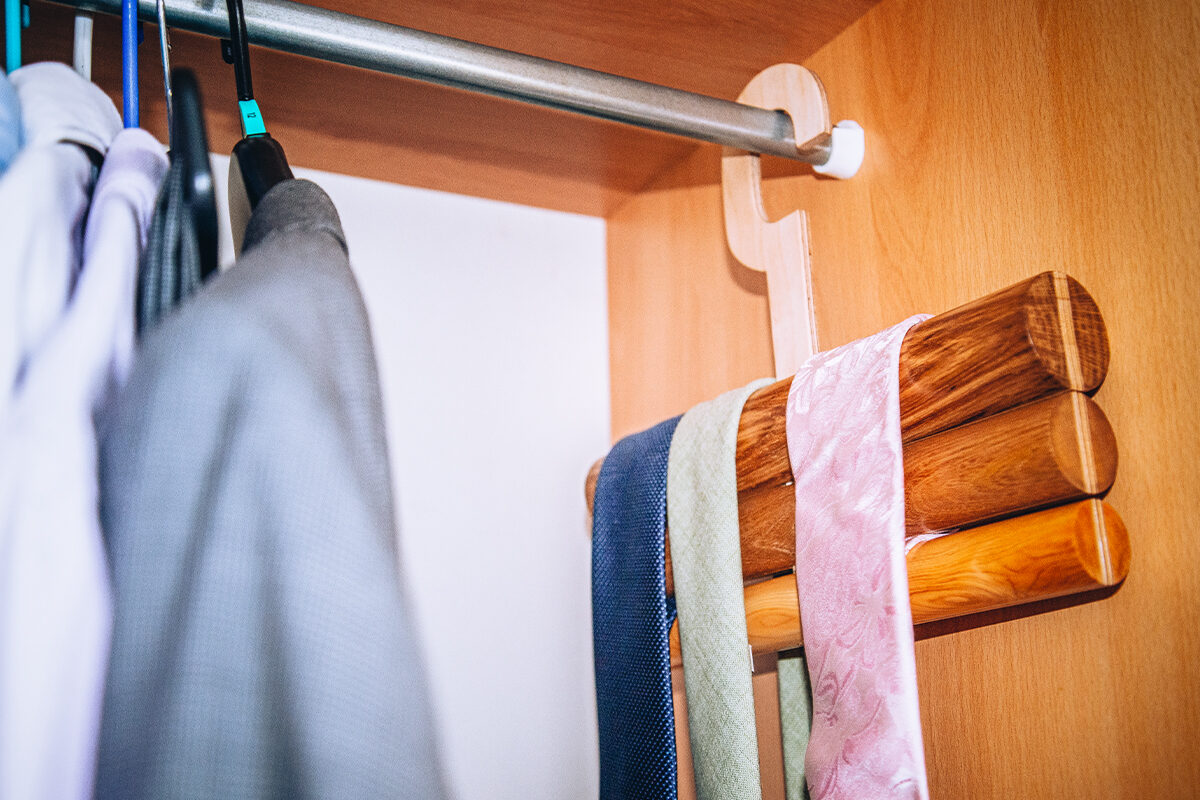
Most people have some ties, but where do they keep these? Maybe thrown in a sock drawer, or hung up with the suits and shirts? What could be nicer than a handmade wooden tie rack that separates the ties, each layer allows the ties to overhang the ones on the lower rail. This can be hung up in the wardrobe, leaving these easy to find and ready to wear.
Watch our Woodworking Wisdom demo, or follow our step by step guide below.
Part 1 – Get organised
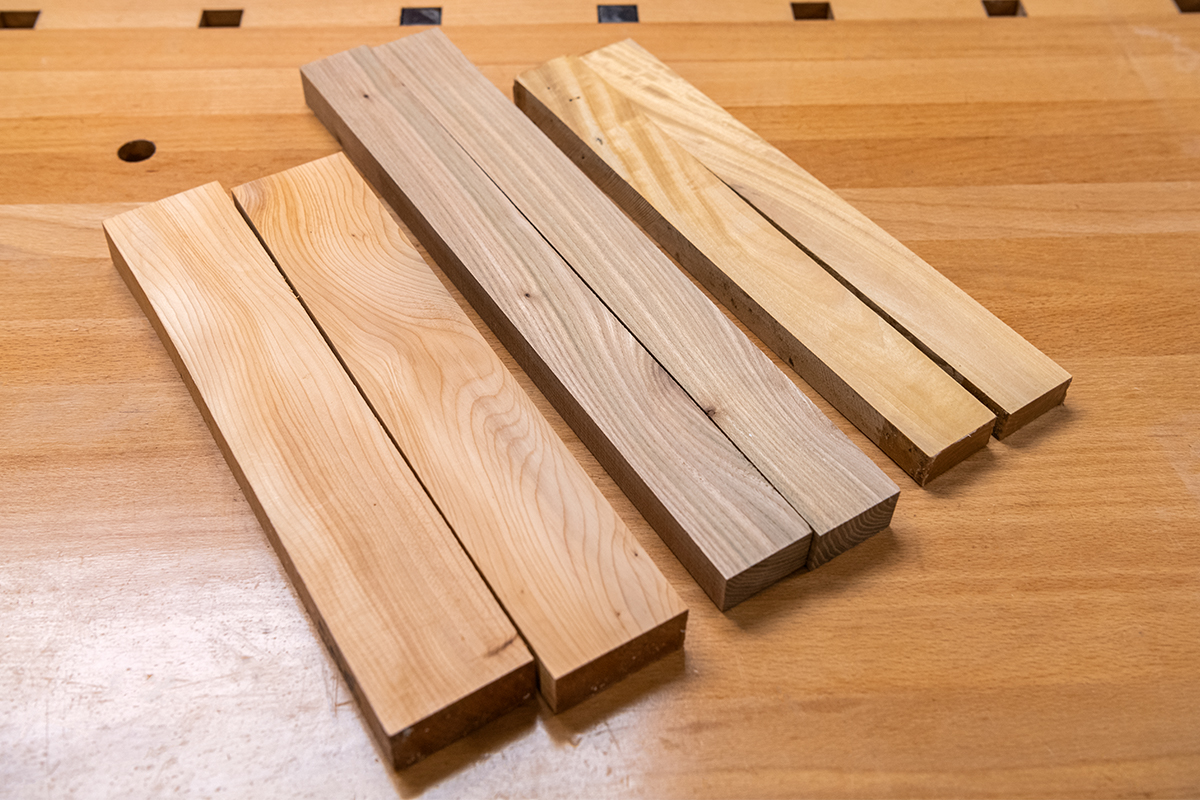
Firstly, select the timbers. This can be the same timber or this can be three different timbers to create a contrast, plane up one face to get flat Two lengths of each size are required.
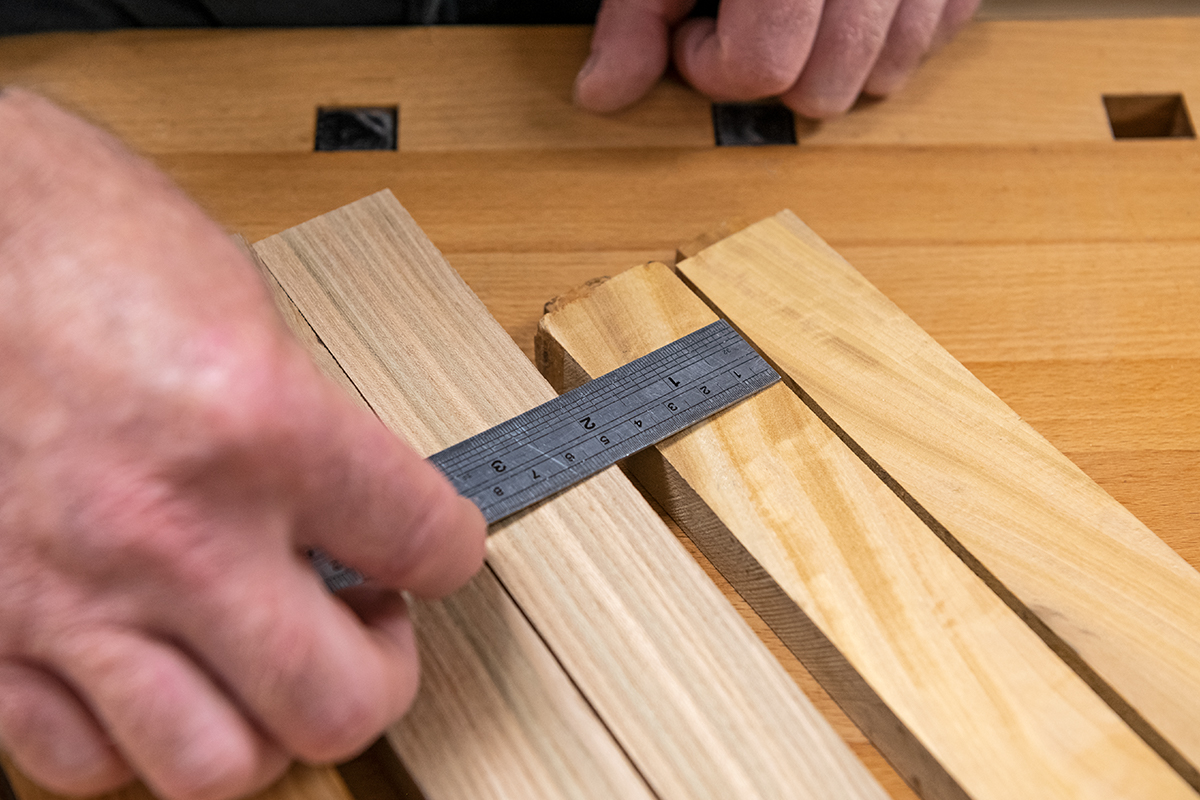
Part 2 – Measure up
Measure the widths to get the sizes of the turned rails. These will need to be a little bit over size to allow these to be turned down to the required diameters.
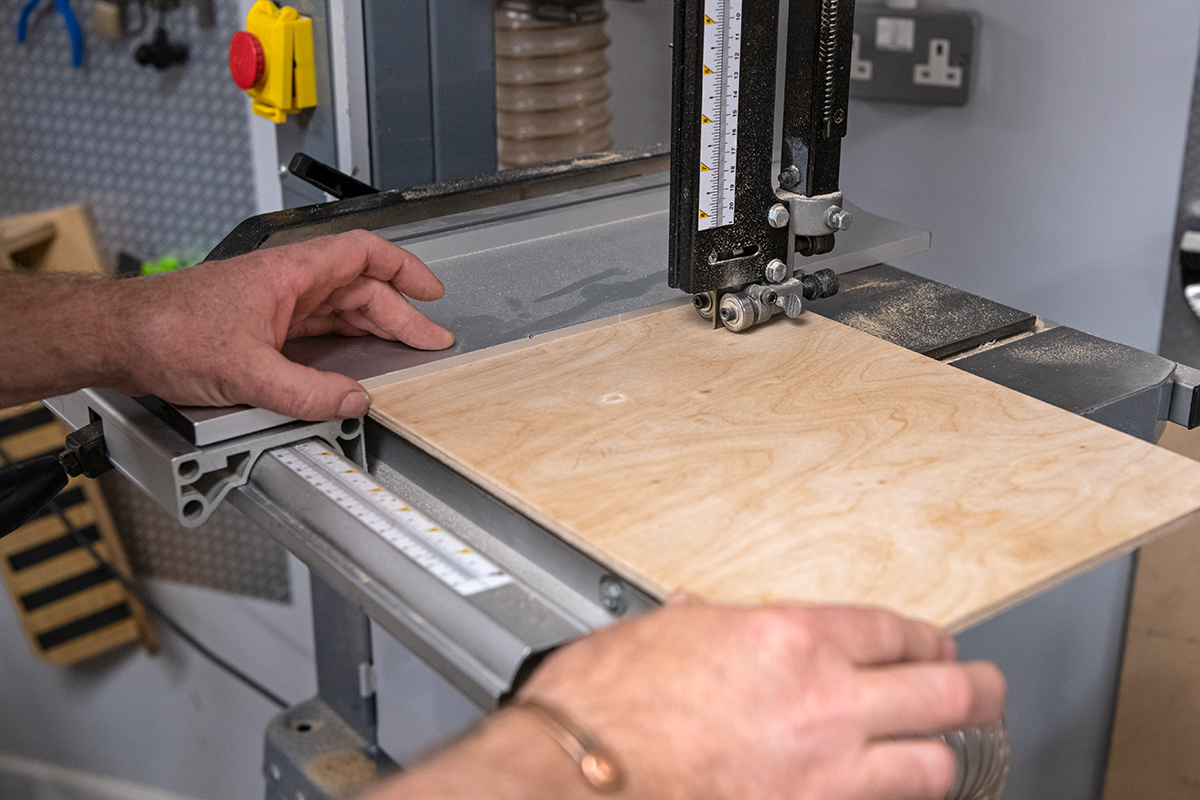
Part 3 – Cut the timber
The 6mm birch ply needs to be cut to the same widths as the timber. Once done, cross cut to lengths. A length of ply also needs to be cut to make the gluing up board. This is 27mm wide. A fine blade, slow feed pace and lower guides all make these more accurate.
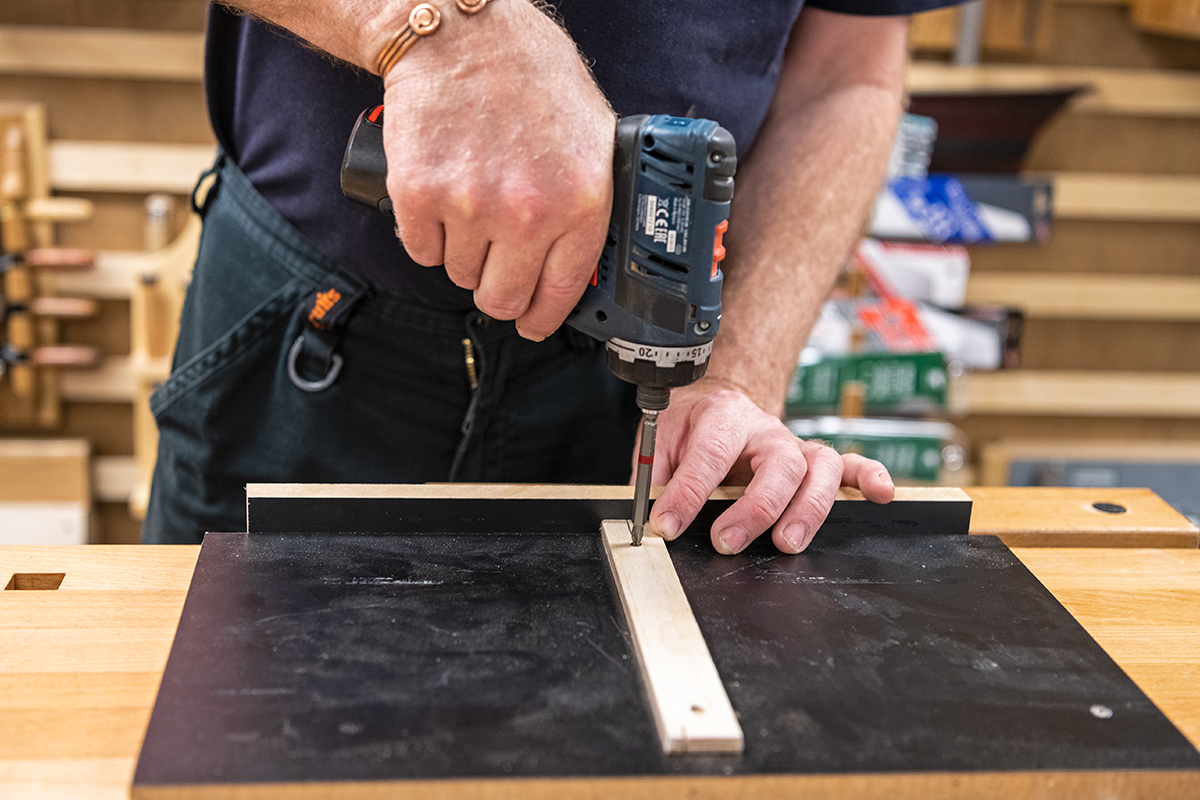
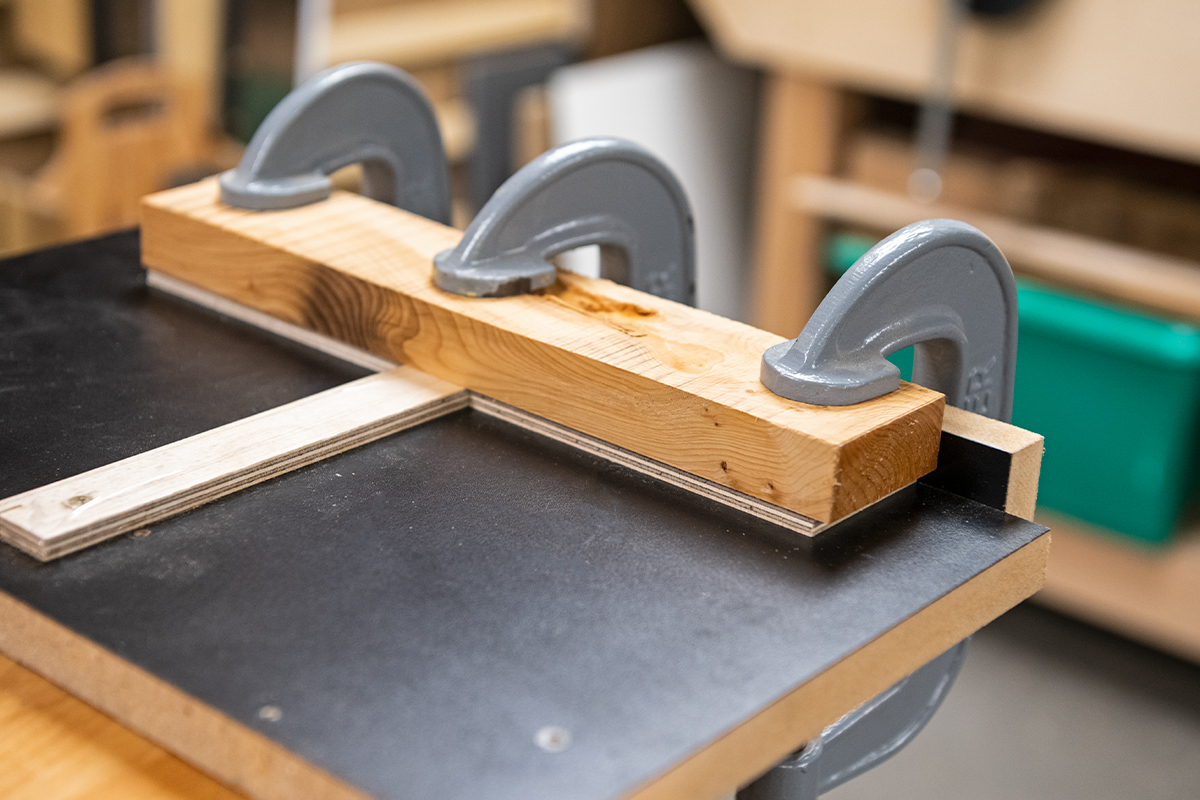
Part 4 – Glue up board
The gluing up board is made of some scrap board. Melamine coated is ideal as the glue will not stick to this. A backstop is added to help keep this stage more accurate. The length of 27mm plywood is screwed onto the centre of the melamine board at right angles to the back stop.
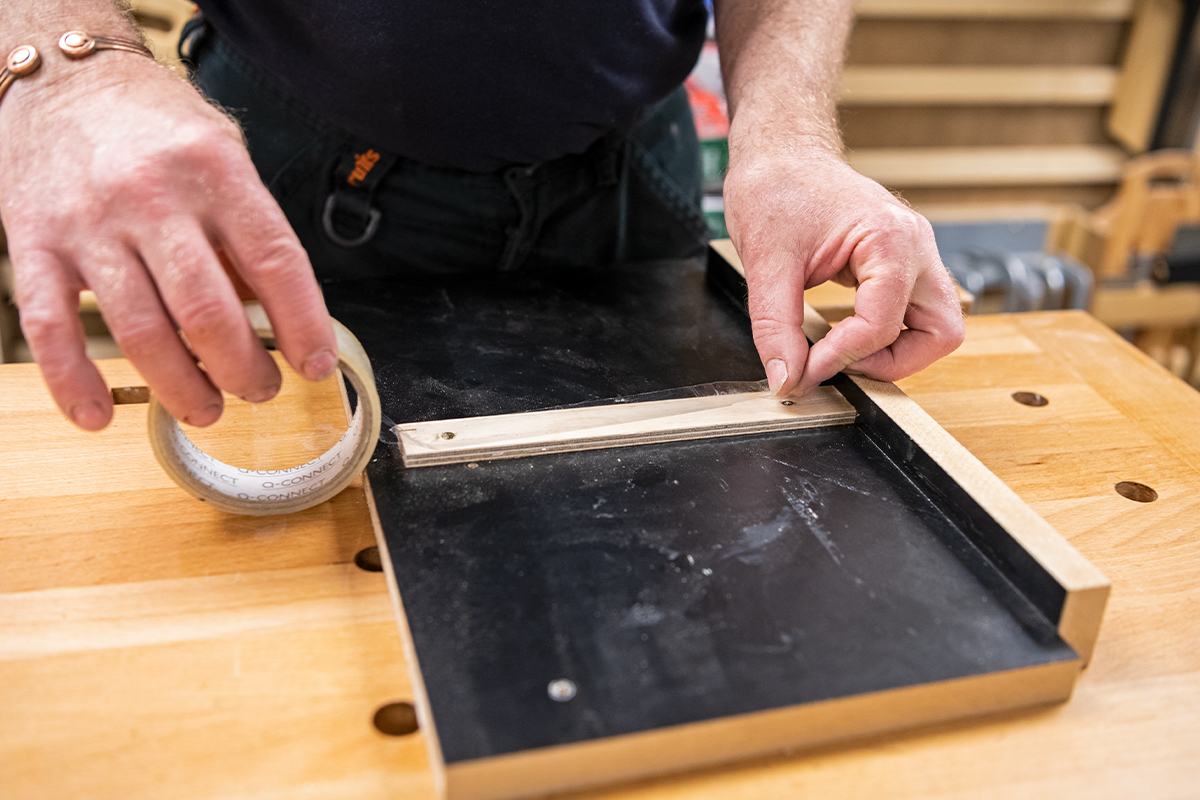
Part 5 – Prepare surface
To ensure that the glue will not stick the workpiece onto this plywood strip, cover the surface of the plywood strip with sticky tape.
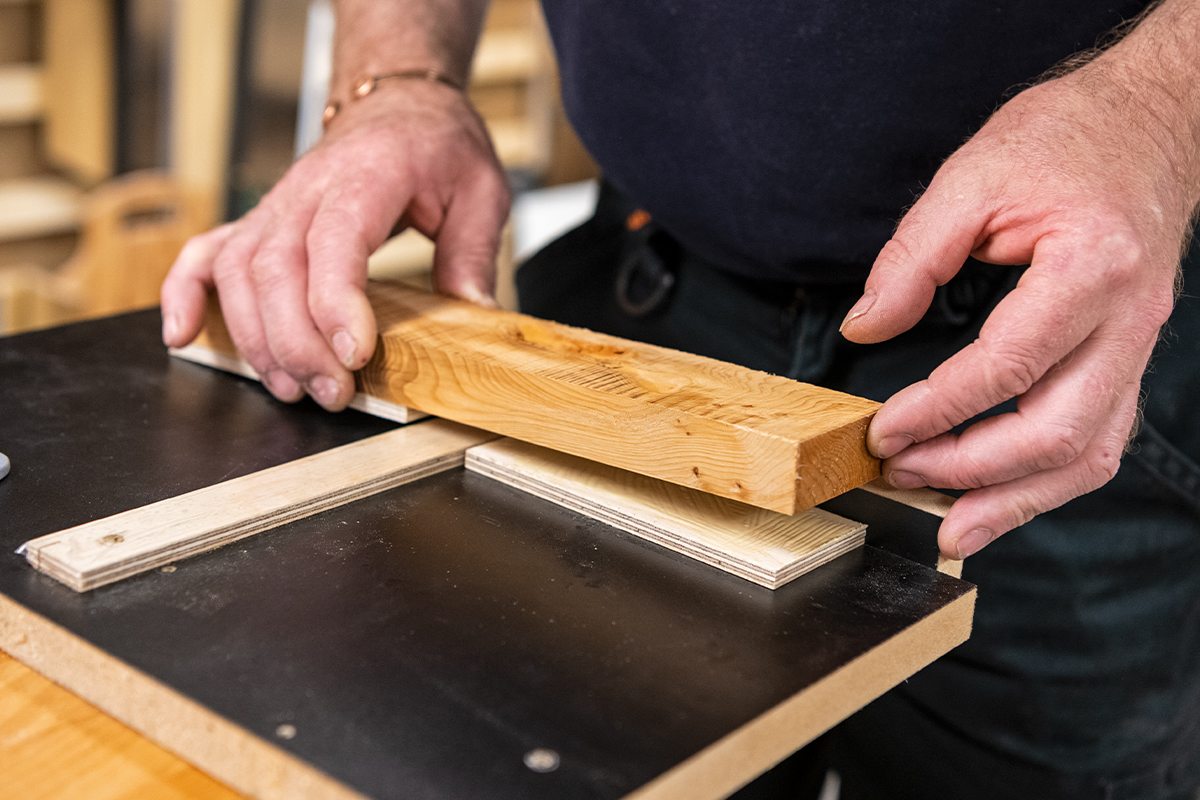
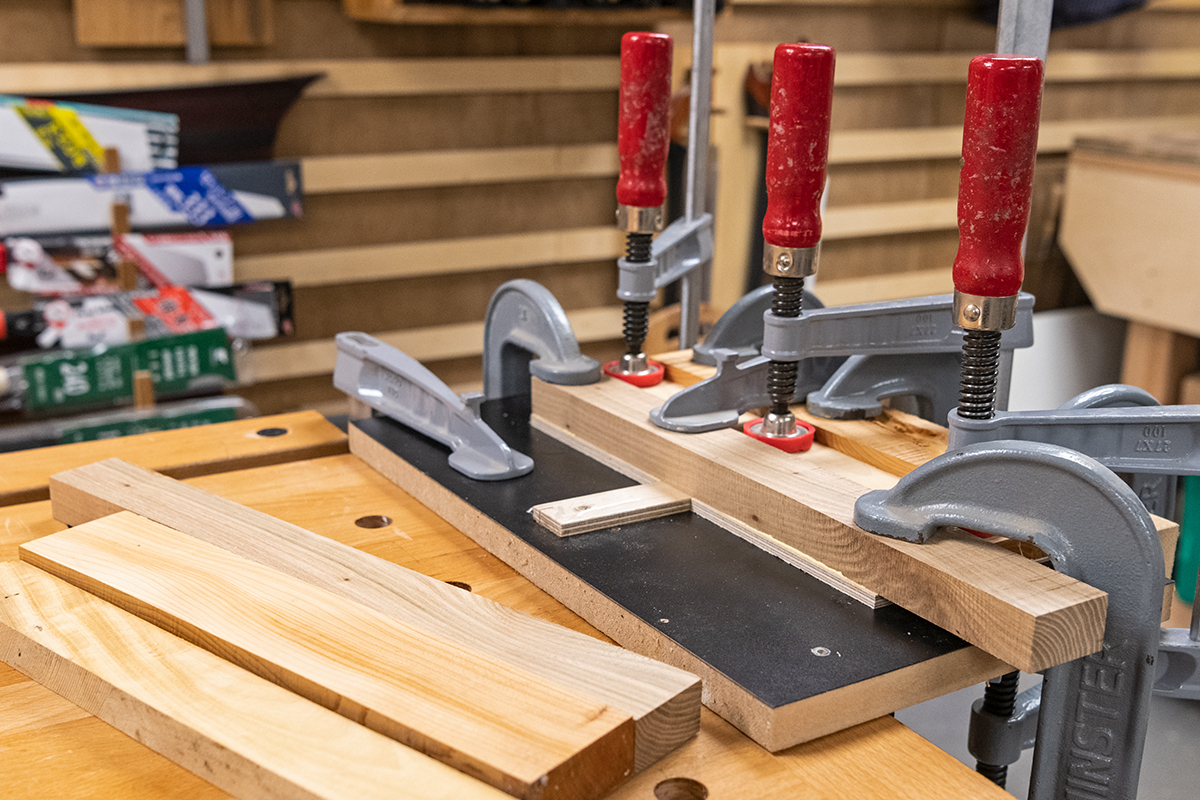
Part 6 – Glue
Glue the plywood onto the prepared face of the timber. Spread the glue onto the plywood; only an even thin layer. Too much will ooze out if you put too much on. Position this onto end of the timber.
Do the same with the second piece of plywood. However, this time place this onto the glueing up board. Then lower the face side of the timber onto this. Ensure that the two sections of plywood that are being glued are up against the central plywood strip.
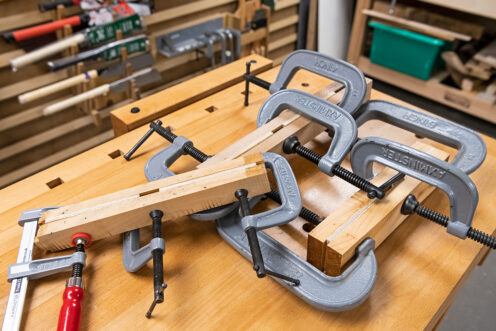
Part 7 – Hold in position
Hold this in place using clamps.
Part 8 – Glue rails
All three rails need to be glued up in this method. You can either glue them one at a time if you don't have any clamps. Alternatively, glue all three at once if you have clamps. Leave the rails to dry. Be sure to keep the other timber sections as these will be glued on once this first glueing up has dried.
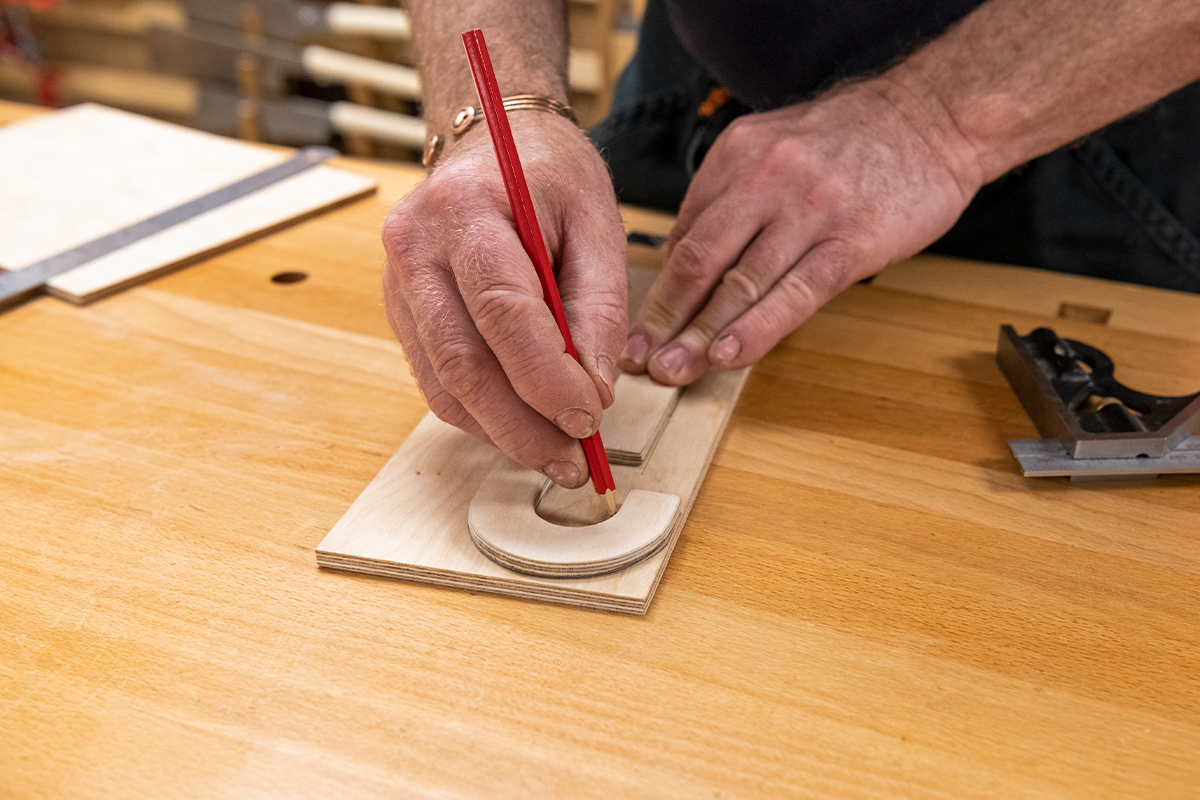
Part 9 – Make hanger
While the glue is drying, the hanger part of the wooden tie rack can be made. Start by drawing this out on the plywood. Please note: the grain direction is not that important for this but it will look nicer if the grain is running the left of the hanger. A template for the hanger can be downloaded here.
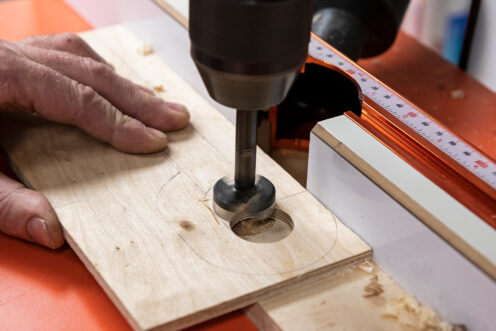
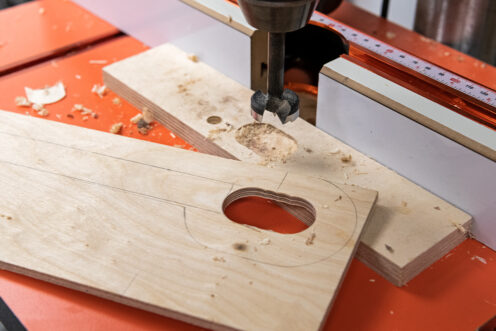
Part 10 – Set up the pillar drill
Next, you'll need to set up the pillar drill if you are using one. Use the 30mm forstner to drill the holes. A back fence on the pillar drill table makes this easier. Use a scrap piece of timber under the work to reduce break out.
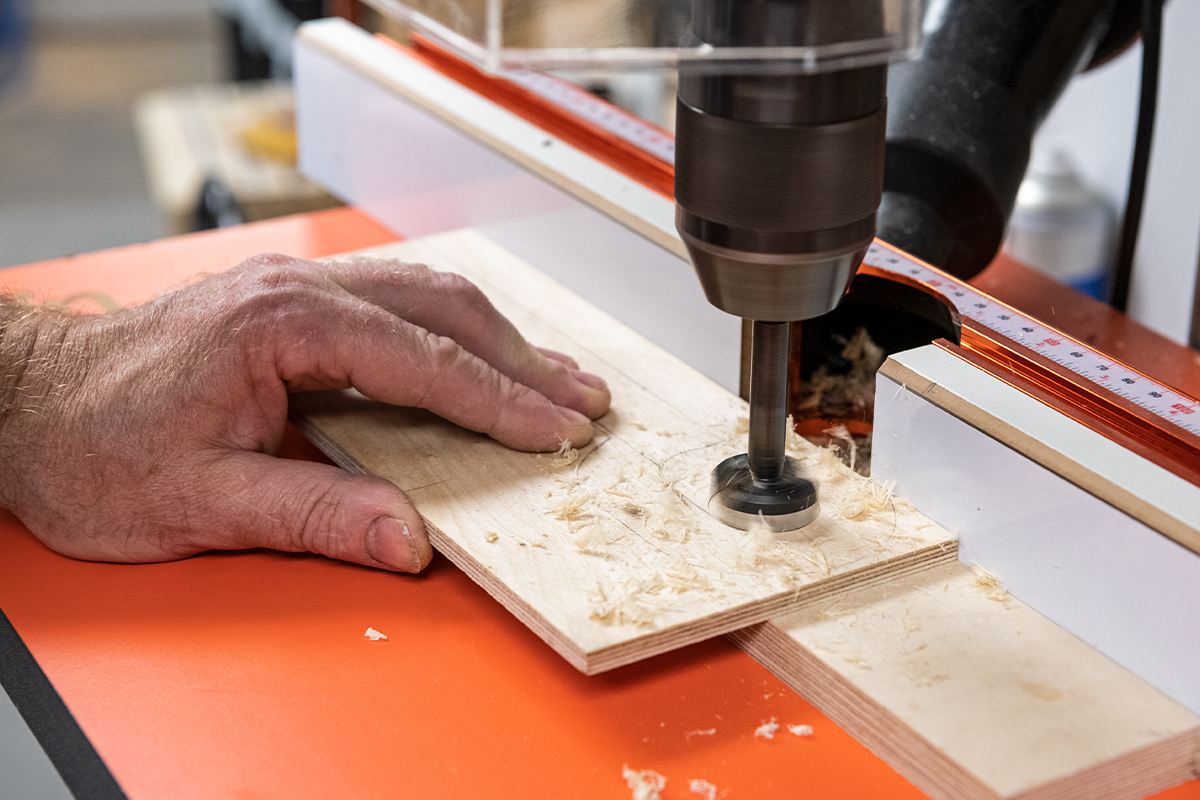
The advantage of using the pillar drill set up and forstner is that the work can be moved along the fence overlapping the holes and leaving very little to clean up.
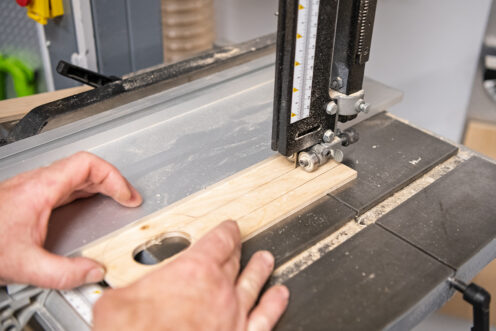
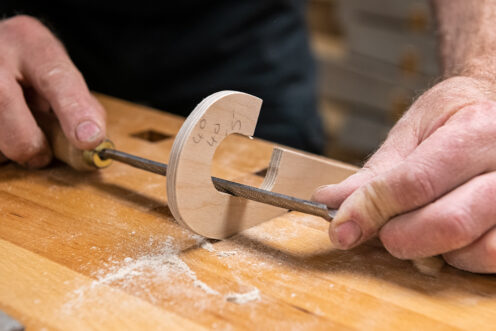
Part 11 – Cut out the hanger
Now cut the hanger out. Do the straight cuts first, running off the fence. Keep the bandsaw guide lower to the work and keep the speed slow to make it more accurate. Next, cut the curved top shape of the hanger and take small straight cuts to form the shape.
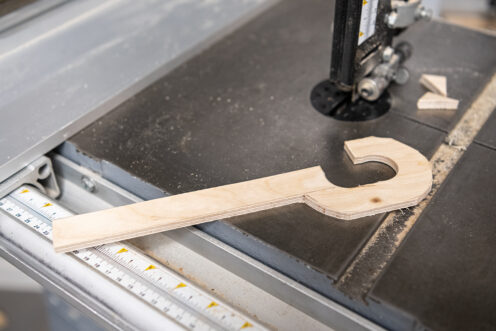
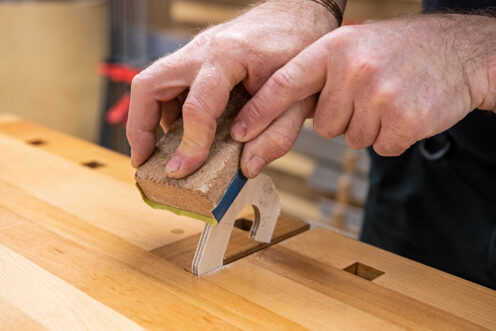
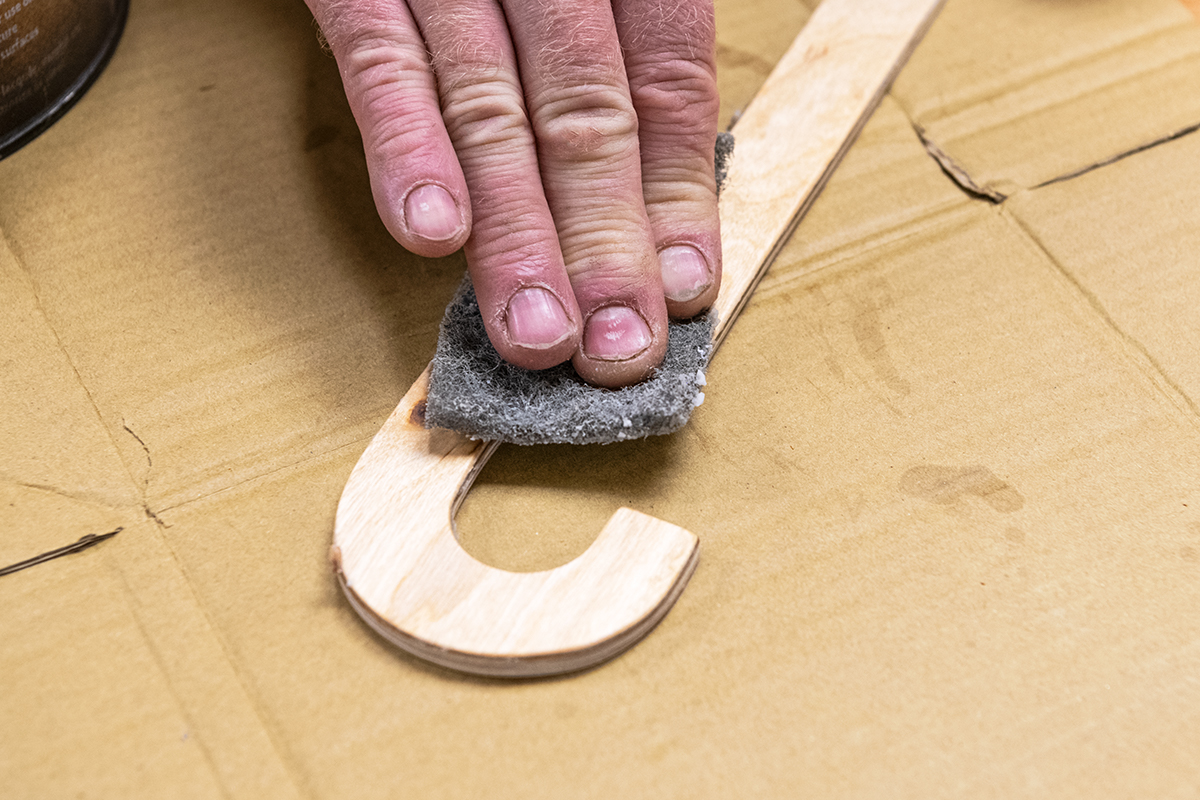
Part 12 – Clean and refine
To clean up the hanger hook, use a Japanese carvers file. To refine the shape, use abrasives to soften the edges.
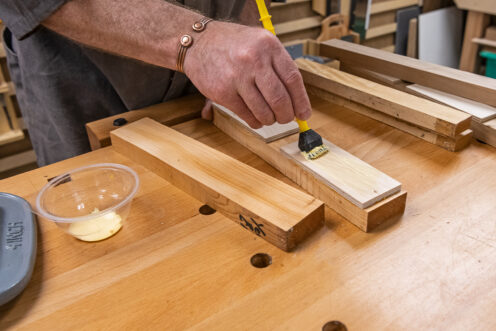
Part 13 – Glue
Once the glue has dried from the first gluing up stage, the other timber section can be glued onto the plywood. Spread the glue onto the plywood, position together, and clamp in place. Let dry.
Part 14 –Trim excess
With the glue firmly set, trim any excess timber back so that this level with the plywood.

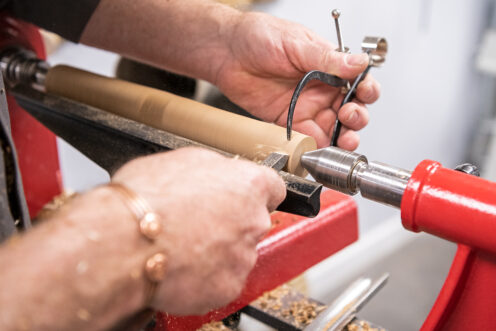
Part 15 – Set up lathe
Set up the lathe and mount one of the lengths between a pro drive and a revolving ring centre. Use a spindle roughing gouge turn this down to a cylinder
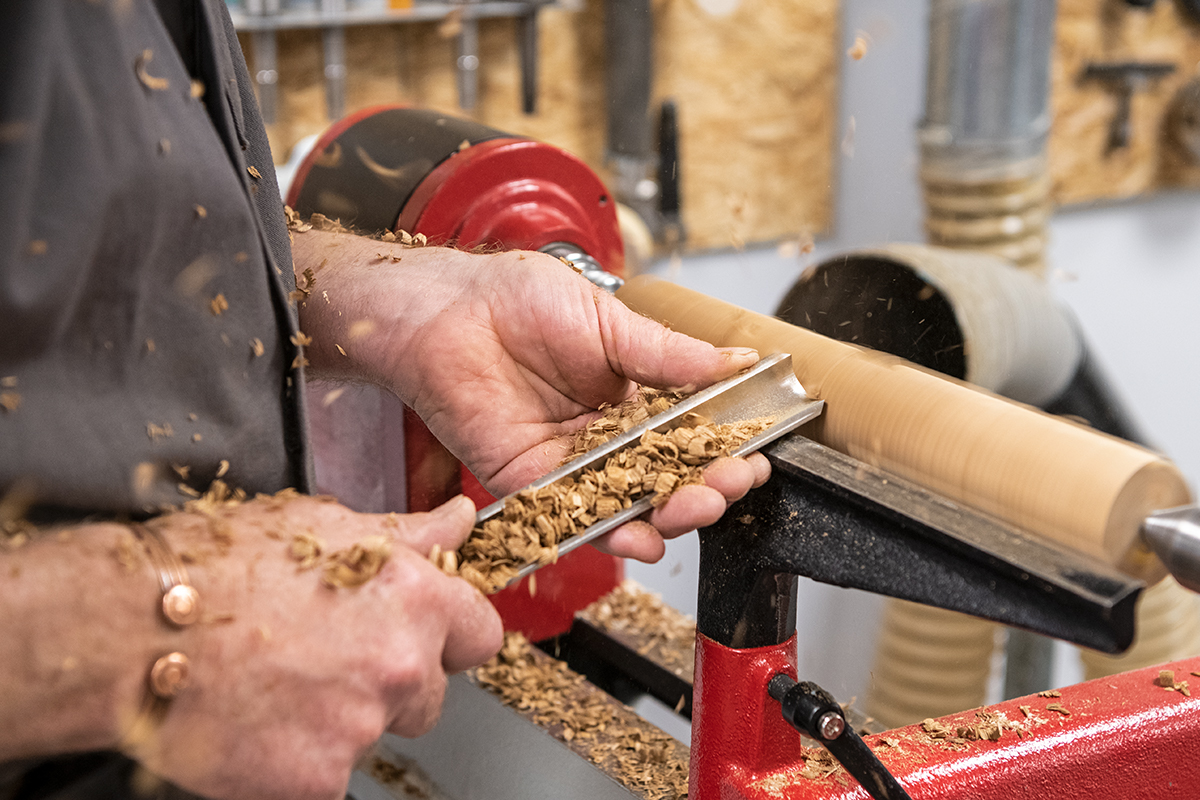
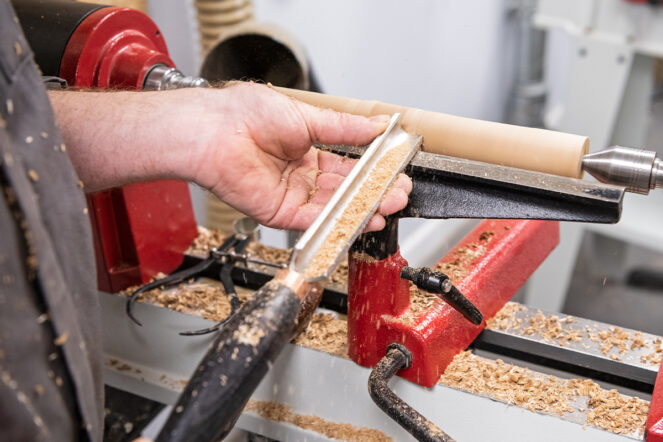
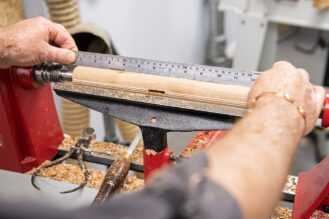
Part 16 – Calipers
To get the correct diameter, and to help create a straight length, set up external spring calipers to the required size. Using a beading tool and the calipers, part down to this diameter. Repeat on either end and about 25mm either side of the hole in the centre.
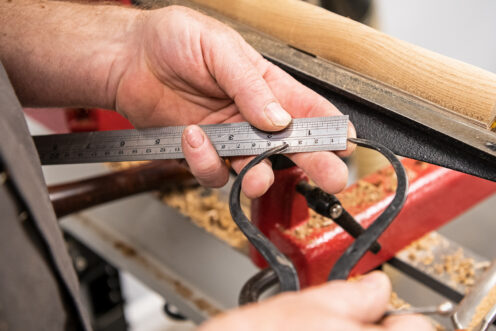
Part 17 – Join cuts together
Use the spindle roughing gouge to join the cuts together. Here, check with a rule to see if these are straight. Sand these using abrasive and a cork block which will help to keep these straight.
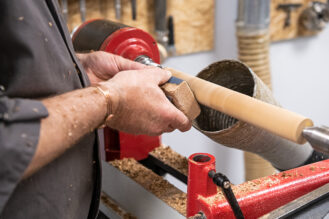
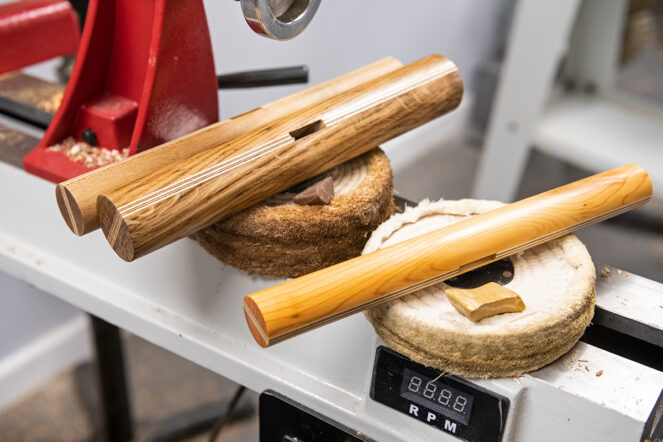
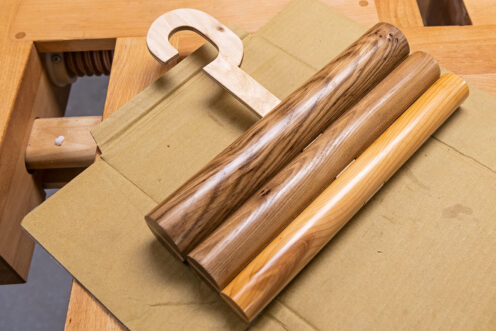
Part 18 – Turn the rails
Repeat this set up to turn the three rails. These will produce the three different diameters below:
Smallest is 30mm dia
Middle is 35mm dia
Largest is 45mm dia
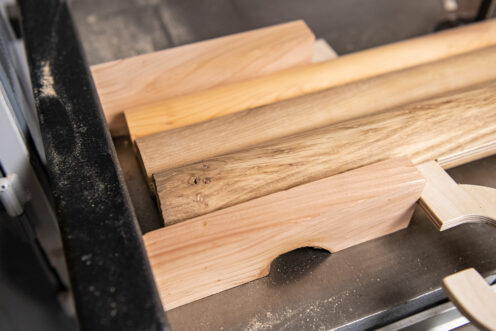
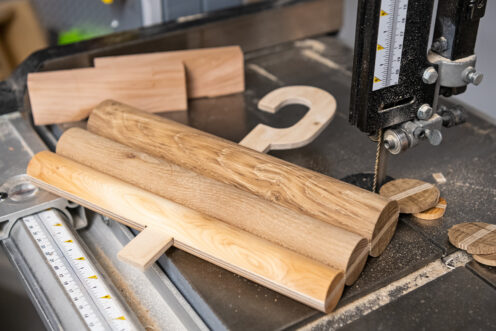
Part 19 – Cut on the bandsaw
To cut these to the same length, insert plywood the hanger hook through the central hole. Next, use two spacer blocks to run off the side of the hook to the fence of the bandsaw. This will keep this parallel and is safe as the plywood holds these firmly with no risk of these rotating. Cut one end, turn the hanger assembly over and do the same with the other.

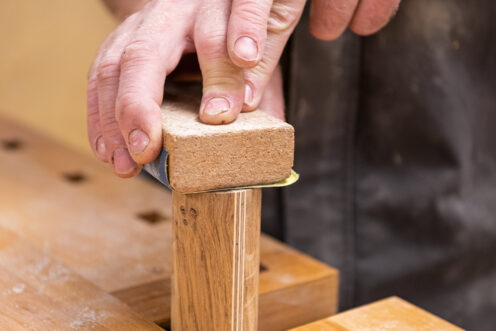
Part 20 – Clean by hand
With the ends cut off, clean up by hand with a sanding block.
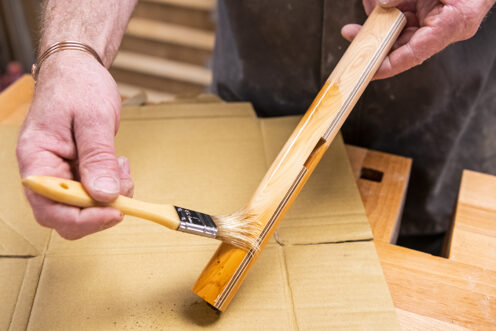
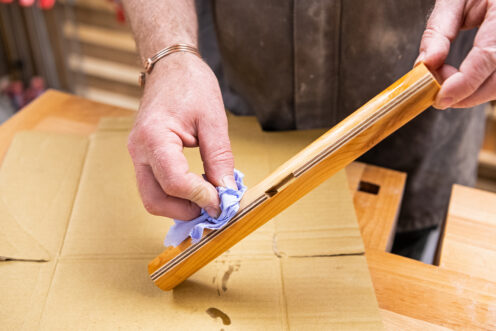
Part 21 – Seal the grain
To polish these, you can you use what you like. In our example, we used a Chestnut Cellulose Sanding Sealer, to seal the grain. This is brushed on and the excess wiped off.
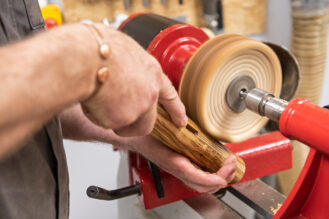
Part 22 – Polish
The sealed timber was then polished using a buffing wheel set up on the lathe. This uses stitched polishing mops, with either a dark compound for the darker timbers like the Oak , or a pale compound for the lighter woods like the Yew wood.
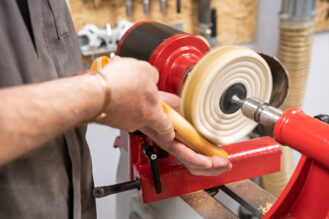
Part 23 – Add a shine
Next, add the shine. Use a loose leaf mop and carnauba wax to produces a shine that will last but looks natural.
Part 24 – Hand wax
The wooden tie rack hanger then gets a hand wax. Here, remember to leave the last 25mm clear of any wax. This is because the area is going to be glued into the smallest rail and the wax will stop the glue holding
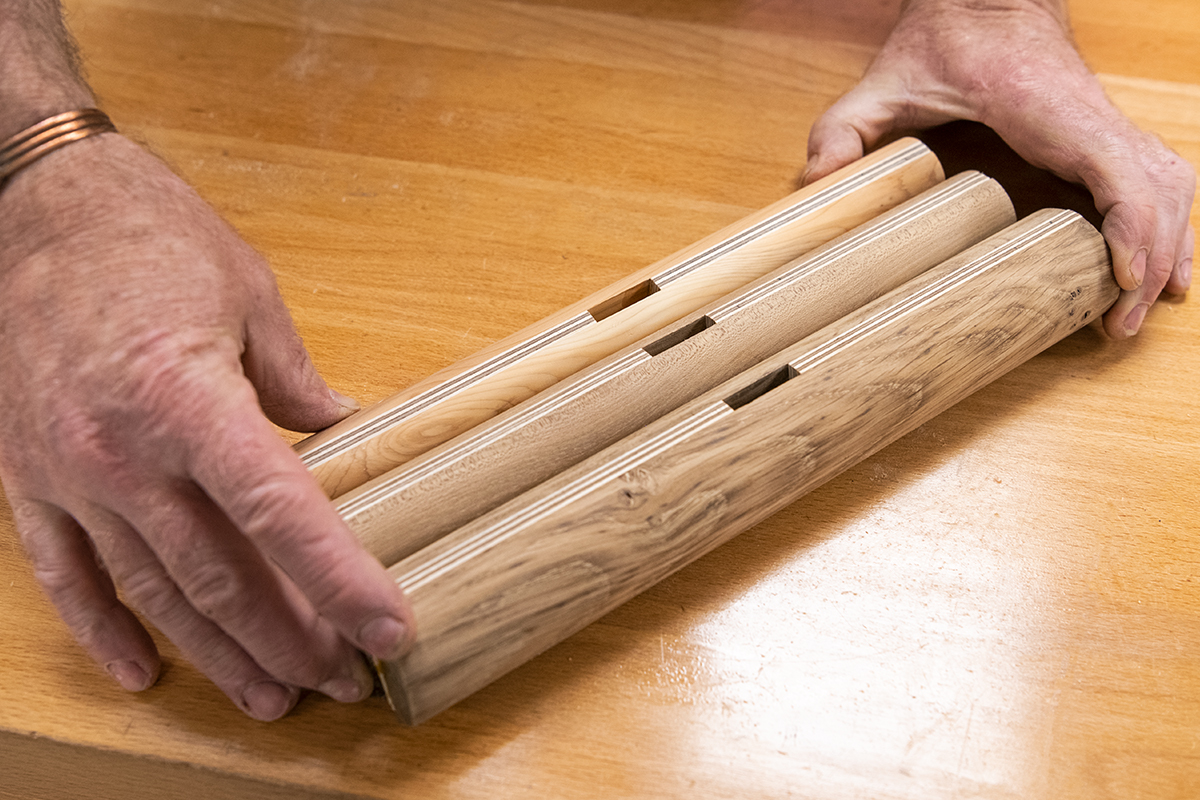
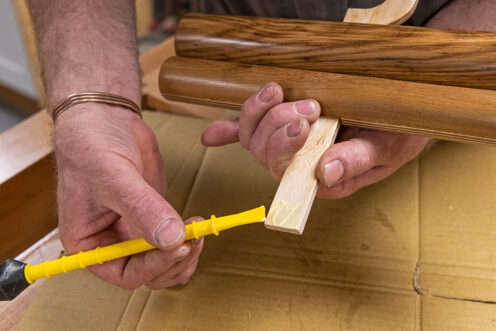
Part 25 – Glue and finish
Insert the two larger diameter rails onto the plywood hanger hook. The top one is the largest. Apply a small amount of glue to the bottom of the plywood hanger. Insert the smallest rail, clean up any excess glue, set aside and leave to dry.
Discover more…
If you’ve enjoyed reading this article, why not take a look at all of our How To projects and see what sparks your woodworking interest?
Get connected!
Follow us on Instagram and Facebook to stay up to date on all the latest projects.