Wooden Elephants
Part 1 - Mark out
In our example, we used a piece of 16mm thick Tulipwood. This will form the gorgeous elephant family and allow the finished items to be free standing. While we used Tulipwood, pine or other fairly easy cutting wood would also work well.
Firstly, use tracing paper to copy your template. Next, to transfer the image use a sheet of carbon paper between the template and piece of wood.
Part 2 - Cut out and drill
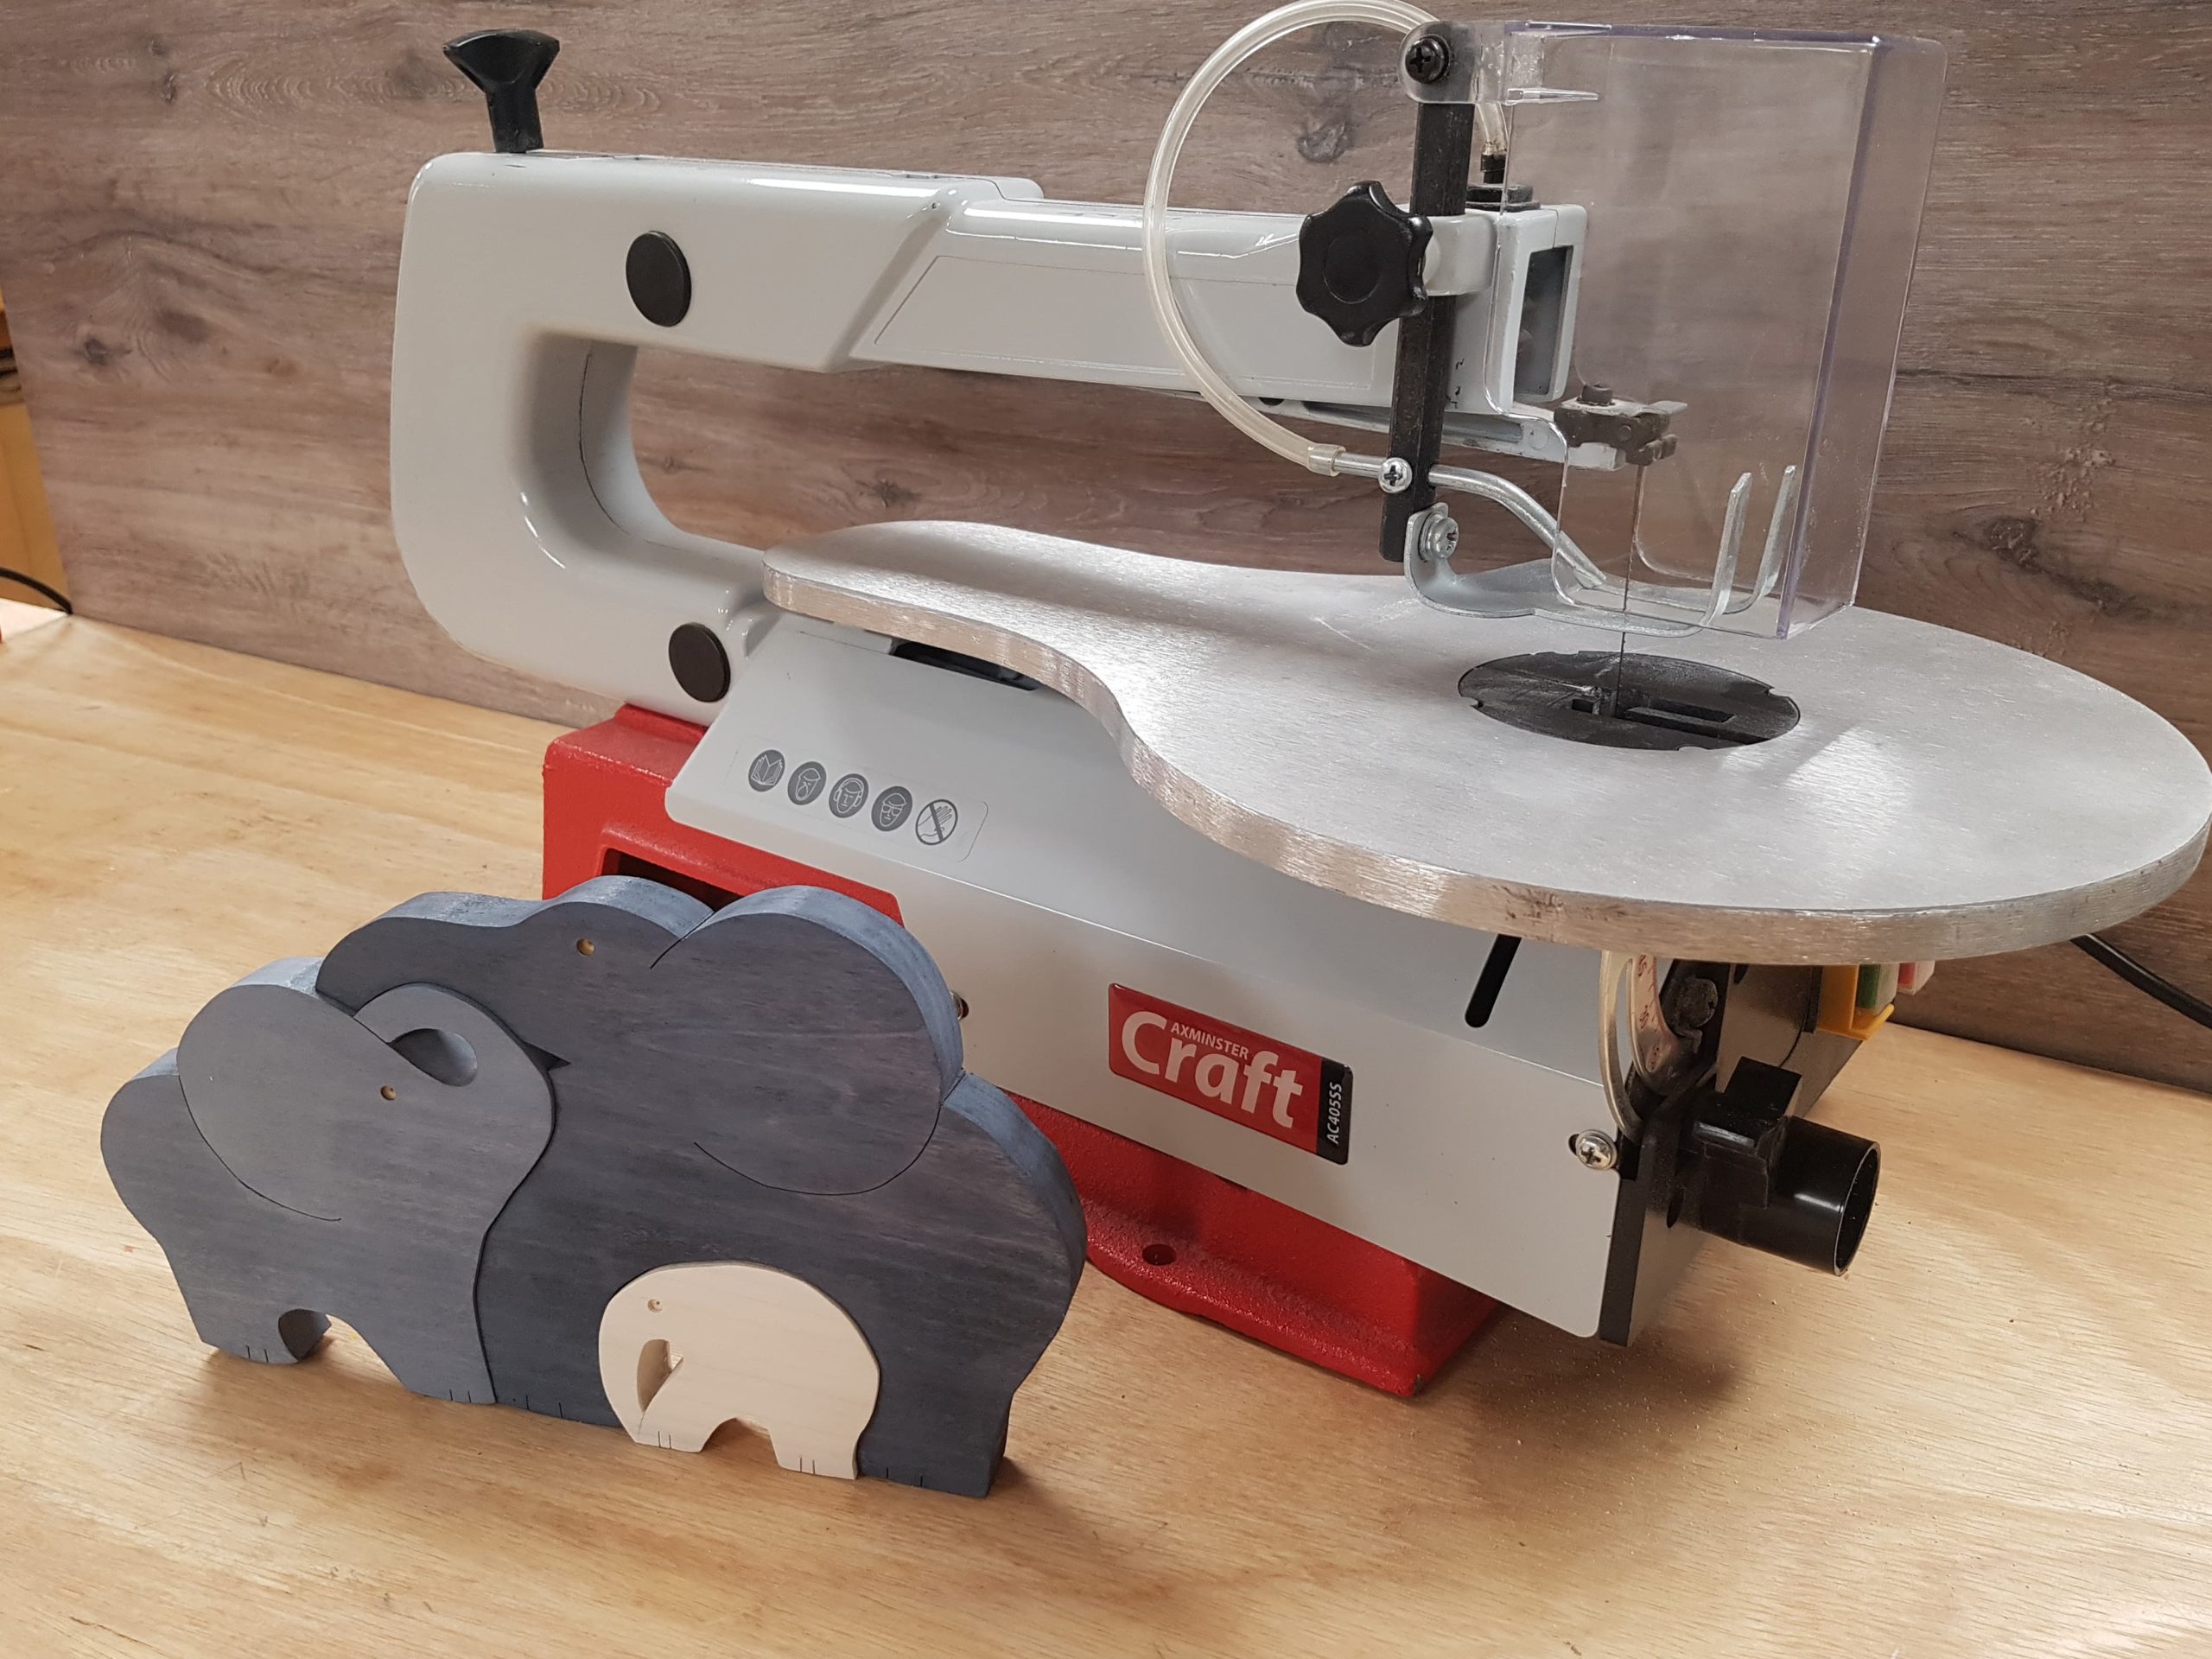
Place your project onto the table of the scroll saw. Adjust the blade guard assembly until it’s just above your workpiece.
Now, you are ready to cut out the design. Here, take your time and carefully follow the line. As always, make sure you wear eye protection and a suitable dust mask. Also, use a suitable extractor.
Once you have the main wooden elephant bodies cut out, make some small cuts in the feet for the toes.
Next, use 180G abrasive paper to sand and remove any remaining carbon.
Finally, drill the eyes for each of the wooden elephants.
Step 3 - Add colour and finish
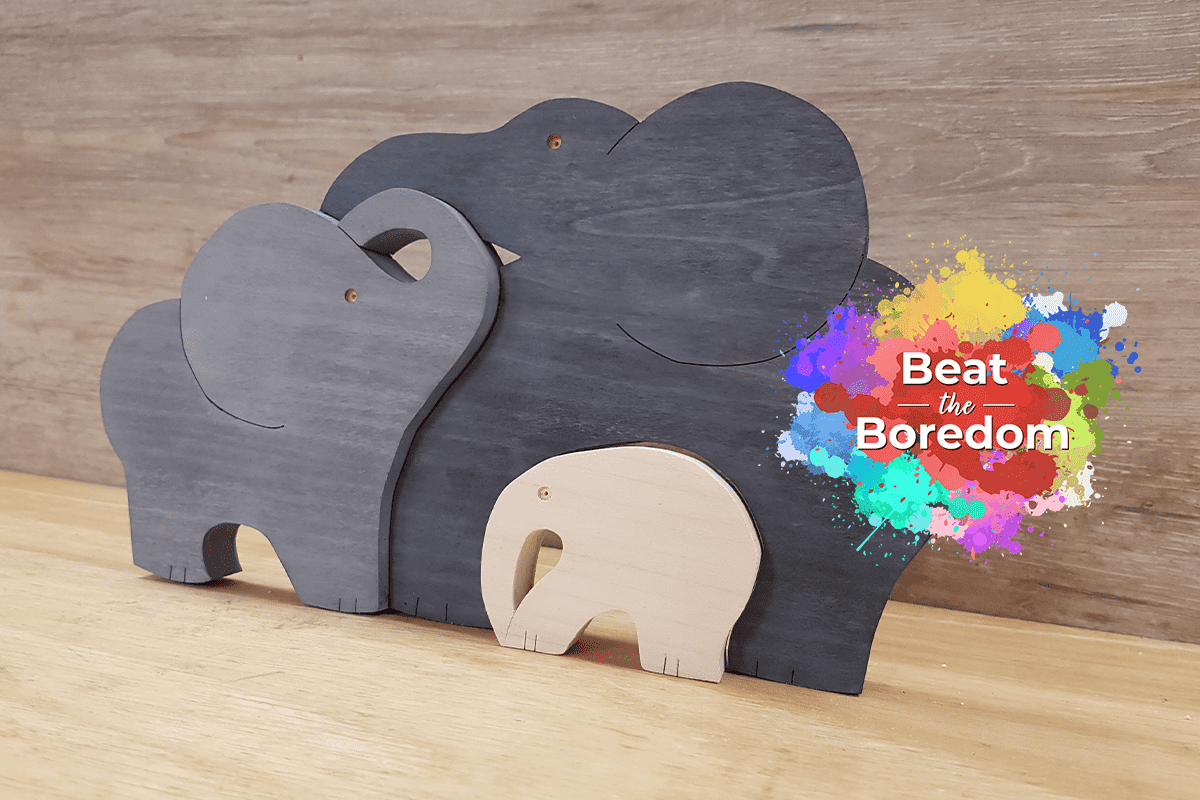
For the final stages of this project, use a spirit wood stain to colour your wooden elephants. How you choose to colour them is 100% your choice. In our example, we began with the white wood stain for the smallest elephant. We then mixed black wood stain to the white to create a grey colour. We used the grey for the middle size wooden elephant. Lastly, we added more black wood stain to create a darker tone and painted the largest wooden elephant using this colour.
We recommend that you test your chosen wood stains on the offcuts. This will ensure you are happy with the colours you've chosen before you paint your wooden elephant family.
Once the stain has dried, apply the finish of your choice. In our example, we opted for a food safe oil.
Download the Wooden Elephant Family Plans
Win a £25 Gift Card…
For a chance of winning at £25 Axminster Gift Card, simply show us what Beat The Boredom projects you’ve completed by uploading them to Instagram, Facebook or on to our Community Forum.
Snap It
Take a photo of your project.
Tag It
Use the #BeatTheBoredom hashtag and upload it to one of the following;
Discover more...
If you’ve enjoyed reading this article, keep an eye out for our next woodworking project for kids as part of our Beat The Boredom series. Watch this space for more details! Furthermore, why not take a look at all of our previous projects below?
Stuck at home with the kids? Looking for something fun to do? We have the answer with our online Beat the Boredom Series. A great way to get the children involved in a variety of...
Get connected!
If you’re searching for Beat the Boredom projects, you’ll find them on the Knowledge website. Alternatively, follow us on Instagram and Facebook to stay up to date on all the latest from our Beat the Boredom series. Connect with us using #BeatTheBoredom to @AxminsterTools.


This looks a great little project for a rainy bank holiday weekend. I can’t see a link to the template for elephants. Is it in the article please?
Hi Roger, the template plan has been added to the bottom of the Knowledge article. Thanks, Hannah
where is the elephant template
Hi Ian, the template plan has been added to the bottom of the Knowledge article. Thanks, Hannah
a downloadable template would be nice
Hi Mark, the template plan has been added to the bottom of the Knowledge article. Thanks, Hannah
This looks like a super project! Where is the knowledge article, please. Do I find it online, or elsewhere - for the template?
Hi Anne, the template plan has been added to the bottom of the Knowledge article. See here at the bottom: https://knowledge.axminstertools.com/wooden-elephants/ Thanks, Hannah