Wooden Caddy Project
With another sunny weekend ahead, why not keep the kids busy with our next Beat The Boredom project? With just a selection of hand tools, get hands on making a useful wooden caddy. This project is ideal for older children due to the fact it is a little more complex and involves some trickier cutting but you don't have all of the tools listed, panic not! It is a guide of what we used and other tools may be used.
Let's get started...
This project was made using a clean standard sized pallet, and a few simple hand tools.
Part 1 - Size the materials
Thankfully for this project, the pallet didn't need to be taken apart completely which can be very difficult. We simply cut the middle sections either side of the pallet blocks and were left with a decent amount of timber to use. In our example, we had approximately 380mm long timber. The wider pieces would become the ends of the caddy and the narrower pieces would become the side rails. At this stage, look through all of the timber you have and discard anything that is damaged or really knotty as this could prove troublesome later on.
Part 2 - Glue ends and plane up
Firstly, plane flat the faces of the timber. Next, plane square the edges.
Now that you have clean, flat, square edge timber, it is time for the first glue up. Here, to make the ends of the caddy, glue two of the larger pieces together edge to edge. Remember that you will need two ends so this glue up will have to be done twice.
Once clean and planed, glue up the boards edge to edge. Here, we recommend that you use a good PVA glue and three sash or parallel jaw clamps.
When it comes to gluing, preparation is key. Here's some helpful tips for the wooden caddy project:
- Ensure that all faces that are to be glued together are smooth planed and clean
- Make sure that you have alignment marks to work to
- Ensure that you have the clamps laid out ready in exactly the right position
- Have a wet rag to hand so you're ready to wipe off the squeezed out excess glue. This will make it easier to clean up now instead of chiselling off later
Next, lay out the boards and try to look for matching grain patterns. Once you've found what you like, put the two boards together and make a couple of alignment marks.
Apply a good amount of PVA glue on to one face and lay it flat on the clamps. Make sure your alignment marks face up and then bring in the other piece of timber and line the marks up.
Clamp up gently until you just see the glue starting to ooze from the joint. Then add in the other clamp over the top again, applying light pressure.
Once you're happy that everything is flat and in the correct position, do the clamps up fully until glue oozes from the entire joint line. With a damp cloth, immediately wipe off all excess glue and leave for an hour. This will give you enough time to start making up the side rails.
Part 3 - Make the side rails
While you wait for the glue to dry on the end panels, it's time to cut and plane the side rails. Using the four narrower pieces of pallet timber, plane up and flatten the face of each piece of timber. Also, plane one edge square. From this edge, the mark out 60mm along the length of each piece.
Next, cut along the line so that your pencil line is just visible. This will give you a mark to plane up to once you've finished cutting. Here, a fine tooth hand saw is perfect for this task.
Now plane square all of the edges. To save time and effort, it's possible to plane up two together as we did. This also helps to keep the plan stable on the timber as there's a wider area to work on.
It is now time to cut and square the timber to length at 370mm. For this part, we used a Japanese style tenon saw and bench hook which gave a nice clean, almost tear free cut, leaving very little to clean up after.
When everything is cut to size, plane or sand up all faces. For this project, we used a low angle block plane to put small bevels on the outside faces of the rails. Alternatively, this could be sanded round if preferred.
Finally, if you choose to screw the rails in place rather than nailing in, drill two small holes each end to suit your chosen screw size. In our example, we drilled 10mm from the end and 15mm from each edge of the rail to secure the rails to the ends later on. Once you have finished drilling, sand off any pencil marks.
Part 4 - Make the caddy ends
With the glue now dry, it's time to mark up and cut out on the end panels.
With the grain running horizontally at the bottom of the timber, make three marks at zero, 75mm and 150mm. Square off vertically.
Next, make marks at 140mm on all three lines and square off horizontally, extending 25mm beyond the three vertical lines. Afterwards, make another 200mm mark on the centre 75mm line.
Join the ends of the line marked at 140mm horizontally to the two lines marked at zero and 150mm at the bottom of the caddy end. This should give you an angle of around 80 degrees.
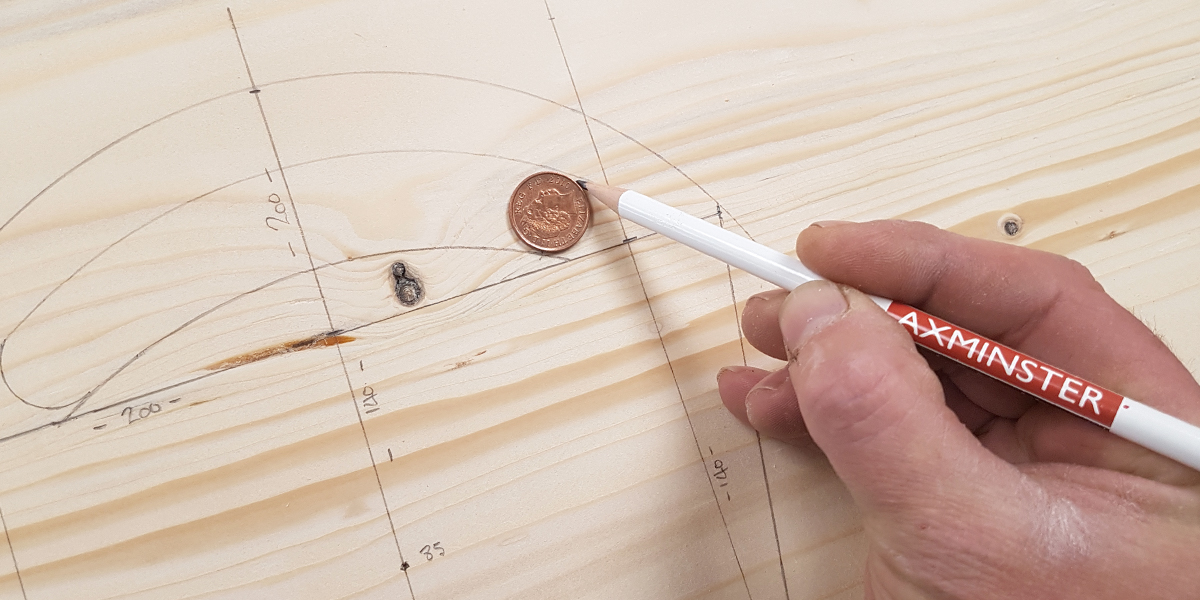
It's now time to mark out the curved top and the matching curved handle. Here, we used a compass and it worked perfectly for this task. Set your compass at 115mm.
Make marks from the bottom at 40mm, 65mm and 85mm. Then use these marks for your compass point to draw the the three curves to form the top and either side of the handle cut out.
You should find that with the top curve you'll hit the 200mm mark at the top and the top at either side of the angled side. This will give you the outside shape you require.
Finally, to help make the small radius at the end of the handle cut out you'll need to find something to help with this. We used a penny as it was ideal for this!
Part 5 - Shape the caddy ends
Firstly with the timber securely held in a vice, cut along the angled sides. We found that the Japanese tenon saw was great for this. It was clean cutting and easy to keep the straight line.
Then using a coping saw, cut along the curve to form the top of the caddy end.
Next, use the coping saw to cut out the handle. Drill a small 4mm or 5mm hole close to the cut line but on the waste side of that line. Detach one end of the coping saw blade and thread it through the drilled hole. Reattach the blade and carefully cut all the way around the handle hole.
Once you've cut this out, have a good plane and sand all around the cut edges. Here, we used a spokeshave which was great for the top curve. If using a spokeshave to finish a curve, it's always best to work with the grain 'downhill' to prevent any snagging and grain pick up.
The angled side can be planed with a nice sharp low angle block plane (pic 68). The inside on the handle should be smoothed using a round rasp ideally, then finished with abrasive paper wrapped around a piece of dowel.
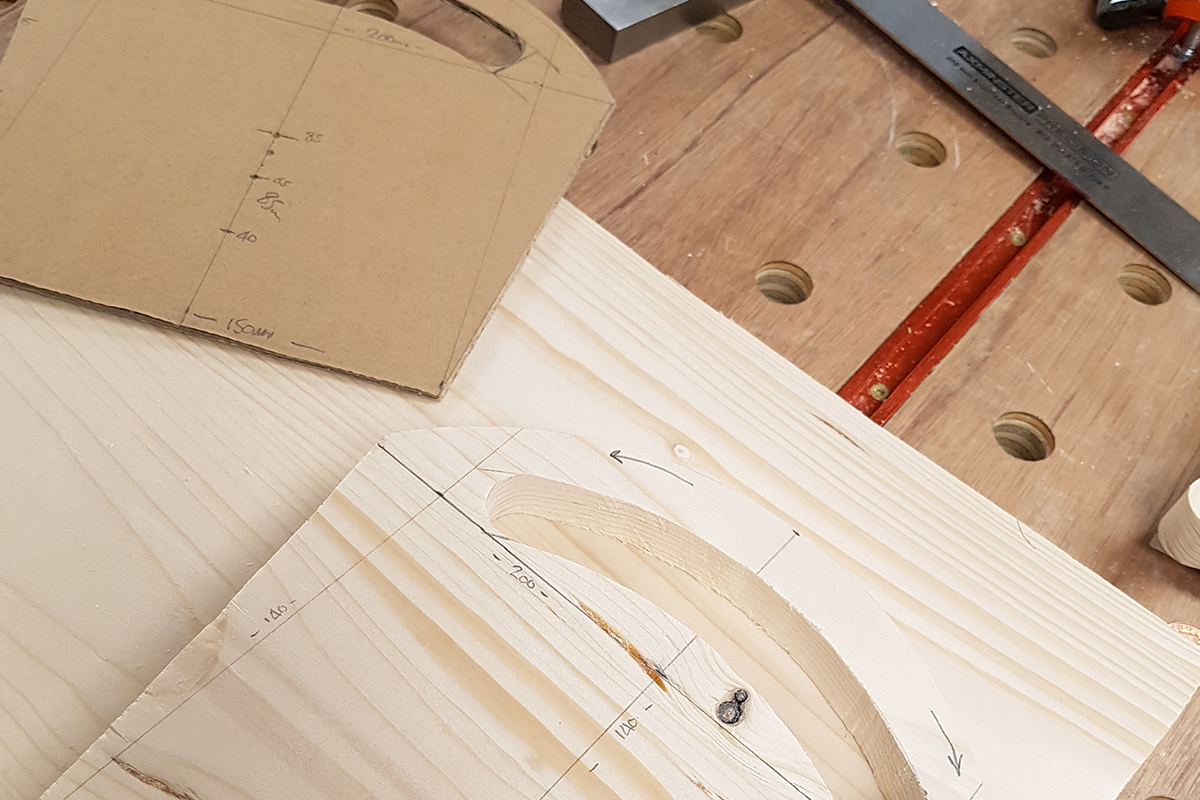
Next, repeat this process again for the other caddy end. To save time measuring and marking, why not use the completed end as a template for the second one? Alternatively, make a ply or cardboard template for if you plan on completing more wooden caddy projects in the future.
Part 6 - Assemble
Now that all of the components are made, it's time to glue and screw up the wooden caddy.
Fixing the first two side rails to the end is the most difficult part, so we suggest holding the end in a vice with the angled edge flush with the bench top. Glue and screw in place the first rail at the bottom of the caddy ensuring all is square and flush to the end. You'll want to line up the bottom edge of the side rail with the bottom corner of the end. The slight angle difference can be planed off afterwards.
Here, try using a spacer of around 10mm to get an equal gap between all rails during assembly.
Continue fixing in all rails, squaring and spacing as you go.
As mentioned above, there will be a slight angled overhang at the bottom of the wooden caddy which will need to be planed off. Use a rule to mark line to plane back to following the bottom of the caddy end then wrap this line around the button rail.
Using a bench plane, take the angled overhang down to the baseline of the caddy end until flat and flush.
Now that the main part of the wooden caddy is made, all that is left is to assemble is the base. In our example, we used 4mm ply, drawing around the caddy to get the correct size.
Using the Japanese tenon saw, cut to size. Then use PVA to glue in place, with the help with some small panel pins.
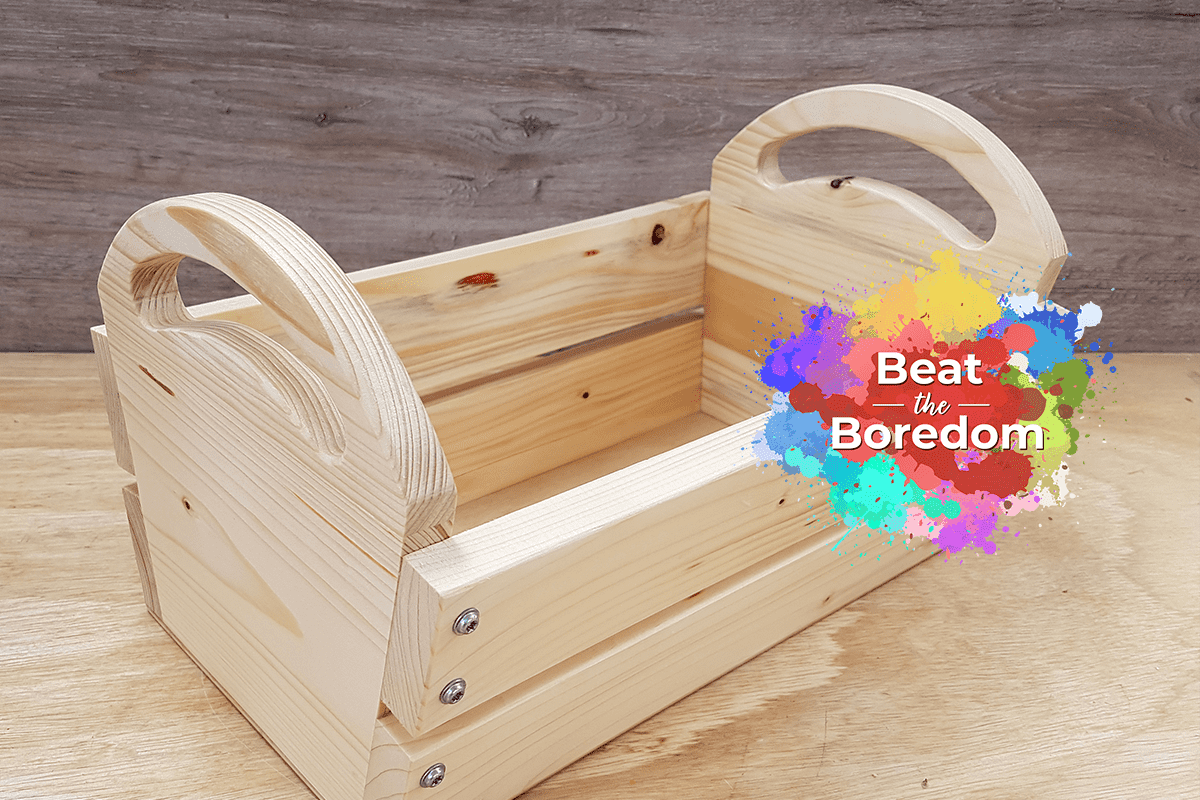
Now that assembly is complete, carry out a final sanding. Make sure that the base is flush, all pencil marks are removed and the handle is rounded and smooth. After you've finished sanding, apply your chosen finish. As you can see from the photographs, we went for an “unfinished” natural look to keep the nice white look of freshly sanded pine. To achieve this look, we opted for the Polyvine wax finish varnish; non yellowing, satin sheen and durable.
Your wooden caddy is now complete!
Win a £25 Gift Card...
For a chance of winning at £25 Axminster Gift Card, simply show us what Beat The Boredom projects you’ve completed by uploading them to Instagram, Facebook or on to our Community Forum.
Snap It
Take a photo of your project.
Tag It
Use the #BeatTheBoredom hashtag and upload it to one of the following;
Win It
Send us your Beat The Boredom creations for a chance to win a £25 Axminster Gift Card- one to be won each month!
Discover more...
If you’ve enjoyed reading this article, keep an eye out for our next woodworking project for kids as part of our Beat The Boredom series. Watch this space for more details! Furthermore, why not take a look at all of our previous projects below?
Stuck at home with the kids? Looking for something fun to do? We have the answer with our online Beat the Boredom Series. A great way to get the children involved in a variety of...
Get connected!
If you’re searching for Beat the Boredom projects, you’ll find them on the Knowledge website. Alternatively, follow us on Instagram and Facebook to stay up to date on all the latest from our Beat the Boredom series. Connect with us using #BeatTheBoredom to @AxminsterTools.


Again, is there a printable plan for the wooden caddy? Will this question be answered? Will man every fly unaided?