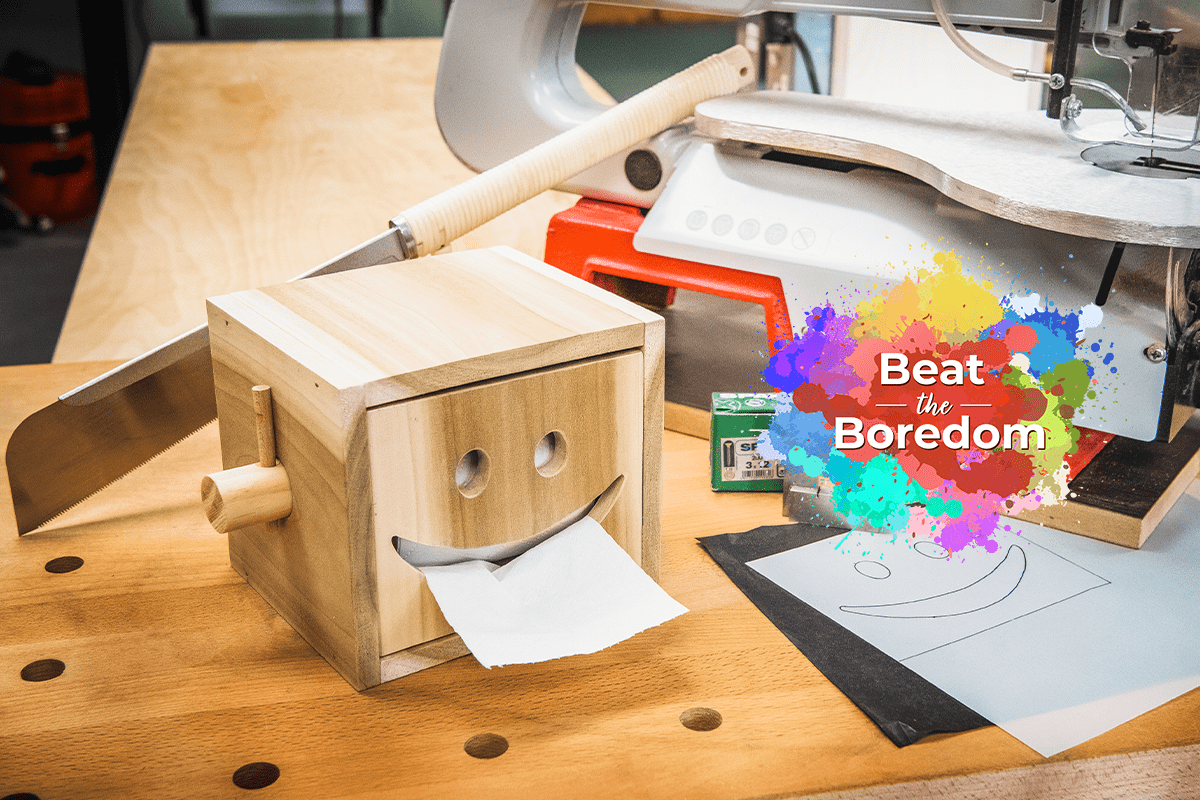
Toilet Roll Holder
For guaranteed smiles and lots of fun, why not give this cheeky toilet roll holder a go with the kids?
Part 1 - Mark out
Using a rule mark out four squares at 150mm. Use a square to mark out each line 90°to the edge of the board.
Part 2 - Cut the panels
Cut the panels on the scroll saw. Use gentle pressure and a slow feed rate to keep the line straight. Sand off any fluffy fibers or breakout.
Part 3 - Drill the side panels
Take two of the 150mm square panels and using your rule draw a line diagonally from corner to corner. Where the lines cross over is your centre point. Using either a pillar drill or a drill guide and a forstner bit drill through side panels. Size your hole slightly larger than the dowel which the toilet roll is going to sit on. We have used a broom handle which measured 29mm so we used a 30mm forstner bit.
Part 4 - Glue the frame
Run a bead of glue along the edge of the top and bottom panels and clamp in place. Tap in a couple of panel pins to secure the joint. Repeat for the other side. You now have an open frame.
Part 5 - Cut out the face panel
Measure the opening where the face panel will sit and cut the panel to size. Transfer smiley face design onto the panel. We have used carbon paper to transfer. Once pattern is laid out, drill holes through the eyes and mouth and cut the face pattern out on the scroll saw.
Part 6 - Fix the dowel/broomstick
Start by running your length of dowel through the previously drilled holes. We want them to protrude roughly 30mm on each side. Measure and cut to size.
Make two pencil marks on the dowel close (3-4mm) to the body of the frame. Remove dowel from frame and drill through on these pencil marks and countersink. We used a 7mm drill bit and tapered an 8mm dowel using abrasives to act as a pin/wedge to hold the big dowel in place. Worth carving a little notch into one of the fixing pins for easier removal.
Worth carving a little notch into one of the fixing pins for easier removal.
Part 7 - Fix the face panel
Lay the face panel down on the bench and place the frame over the top so the face panel sits inside. Make a pencil mark to show the thickness of the face panel then add another 3mm. This accounts for the thickness of the magnet. Screw steel L brackets in this location. Push pencil through the hole on the L bracket to mark location for the rare earth magnets. Screw rare earth magnets into the back of the face panel.
Part 8 - Finish
Sand off any pencil marks and rough edges. Apply the finish of your choice. We recommend finishing oil.
Win a £25 Gift Card…
For a chance of winning at £25 Axminster Gift Card, simply show us what Beat The Boredom projects you’ve completed by uploading them to Instagram, Facebook or on to our Community Forum.
Snap It
Take a photo of your project.
Tag It
Use the #BeatTheBoredom hashtag and upload it to one of the following;
Discover more…
If you’ve enjoyed reading this article, keep an eye out for our next woodworking project for kids as part of our online Beat The Boredom series. Watch this space for more details! Furthermore, why not take a look at all of our previous projects below?
Stuck at home with the kids? Looking for something fun to do? We have the answer with our online Beat the Boredom Series. A great way to get the children involved in a variety of...
Get connected!
Follow us on Instagram and Facebook to stay up to date on all the latest from our Beat the Boredom series. Connect with us using #BeatTheBoredom to @AxminsterTools.