
Make A Love Spoon | Carve with Flexcut Carving Sets
From the plain and simple to the elaborate and complicated, every love spoon has a story to tell. The perfect gift to celebrate a special occasion, friendship or just because, why not carve out your own story and make a love spoon?
What you'll need
Follow our informative How To project and learn how to carve your perfect love spoon!
Part 1 - Prepare your blank
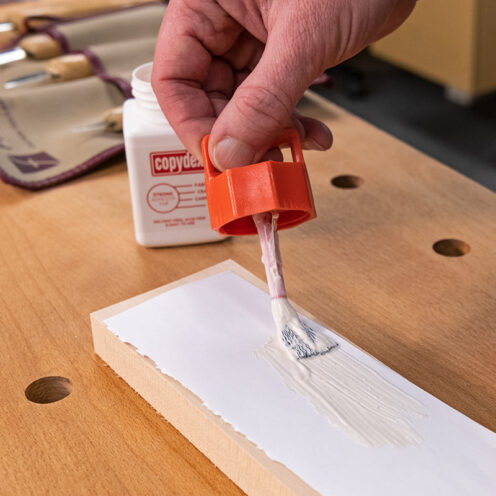
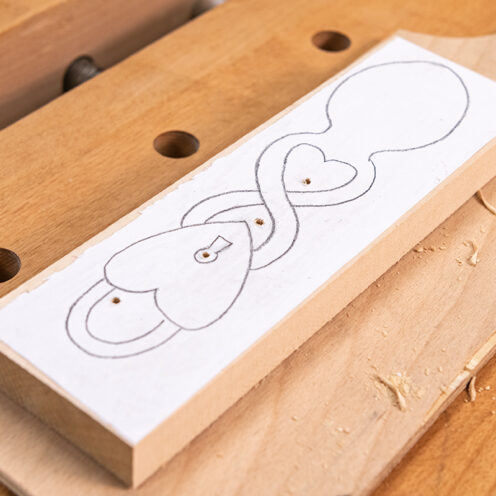
Firstly, you need to find a suitable blank to create your love spoon. We suggest that you opt for a clean piece with straight grain and no knots. In our example, we have used a piece of lime. Once you have made your choice, transfer or stick your template to your blank. A template for the blank can be downloaded here.

Part 2 - Drill the shapes
Next, drill through all of the internal shapes. You need to try to keep the drill straight, especially when drilling the keyhole.

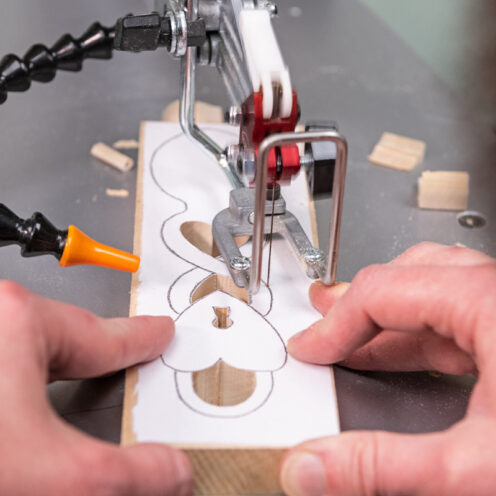
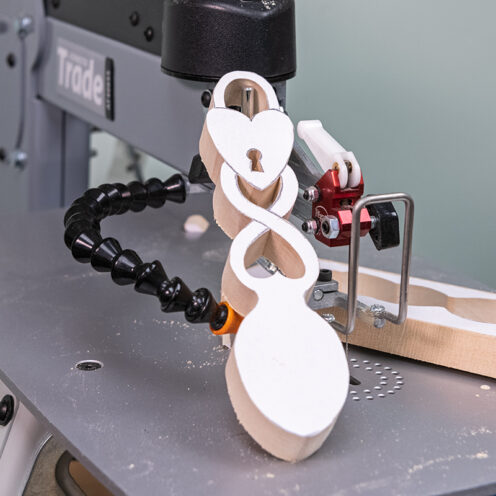
Part 3 - Scroll saw
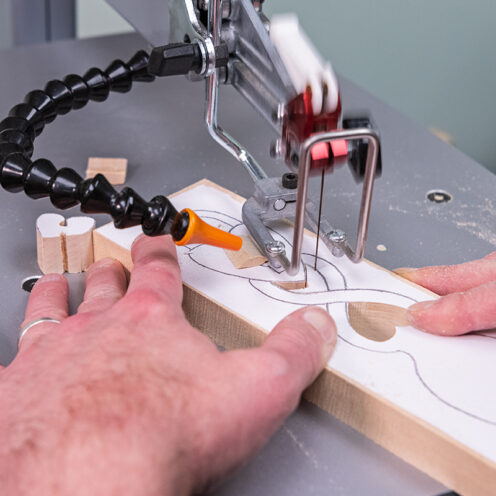
The next stage is to thread the scroll saw blade through the drilled holes to cut out the internal shapes.
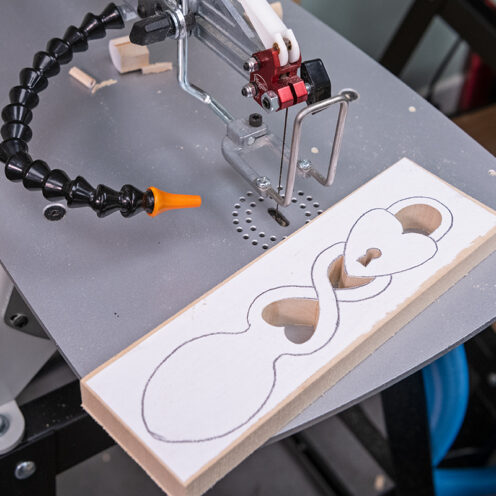
Then, cut the external shape of the spoon on the scroll saw
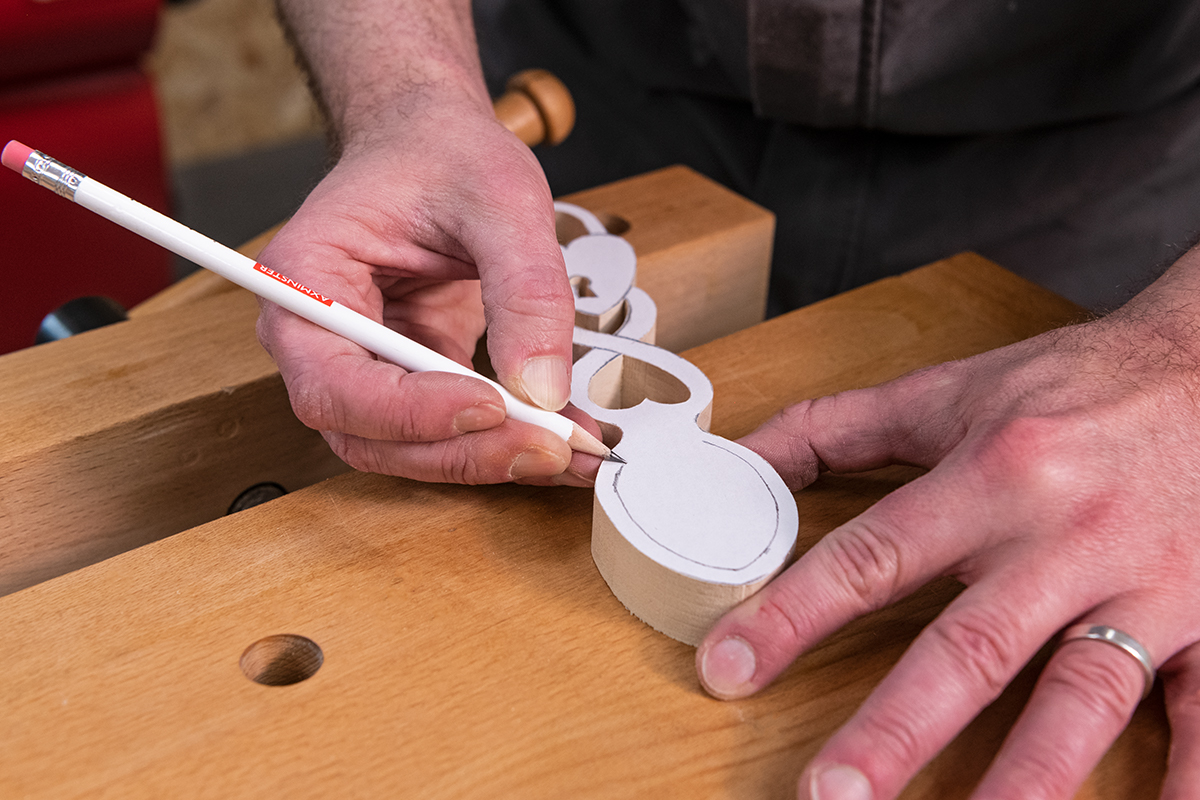
Part 4 - Mark out
Now mark out the bowl of the spoon with a pencil. Be sure to fix the workpiece safely and securely. In our example, we held it in a bench vice.
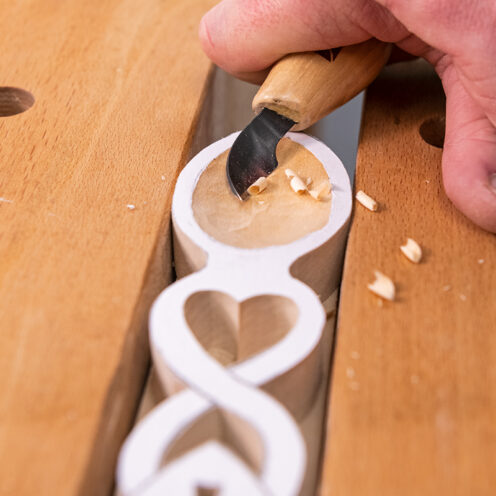
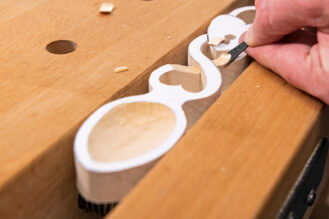
Part 5 - Carve out your love spoon
Using a Hook knife, carve out the bowl. Work from the rim into the bottom of the bowl. If you find the grain is starting to lift, try to work across the grain. Take extra care not to cut the rim.
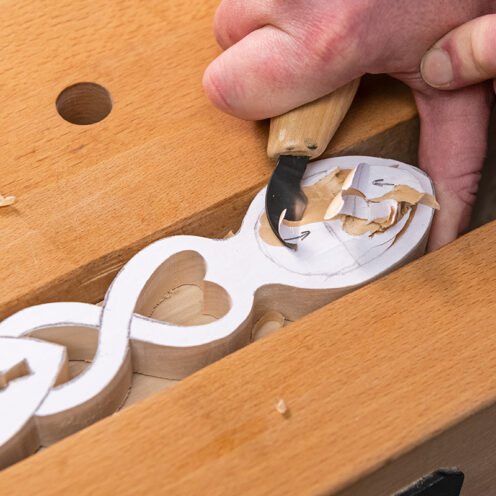
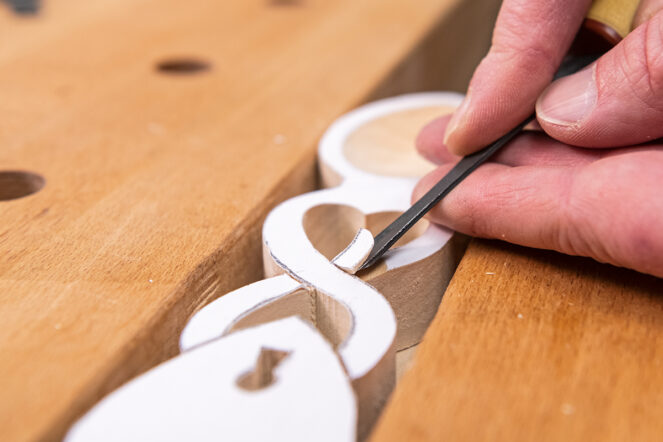
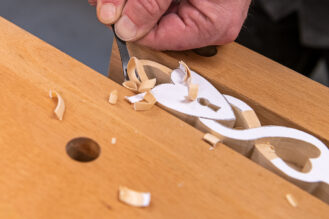
Next, look at your template. There are parts that overlap, and parts that sit lower than others. You now need to add in some stop cuts. Try to match the profile of your gouges to the lines on the template.
Offer your chisel or gouge up to the lines and push down to cut into the top face of our spoon blank.
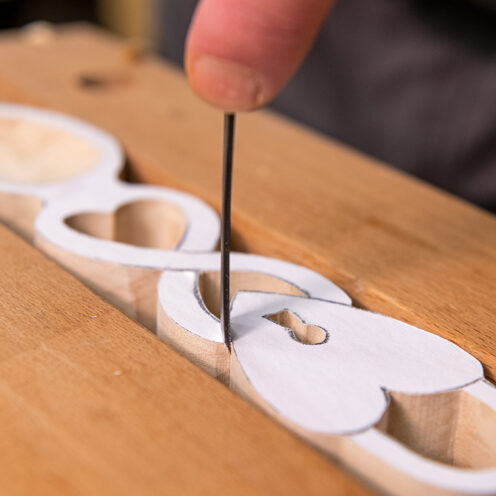
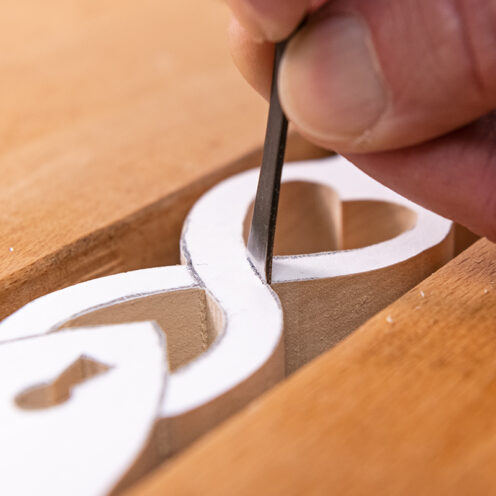
Then, carve with a light pressure up to your stop cuts. You may need to repeat these steps to carve down to your preferred depth.
Continue with these steps until you have relieved all the high points.
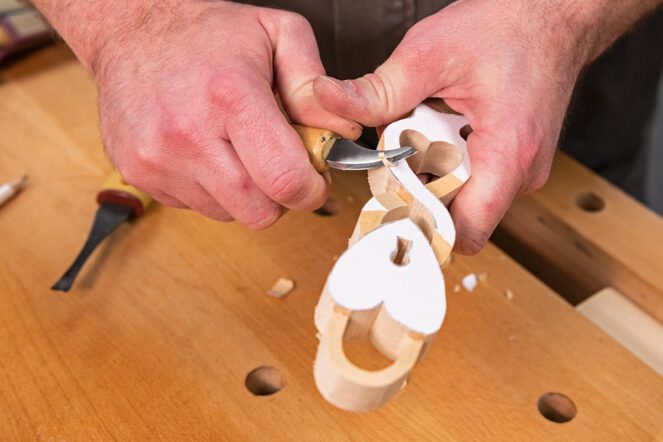
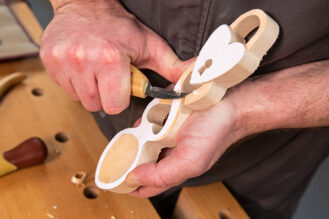
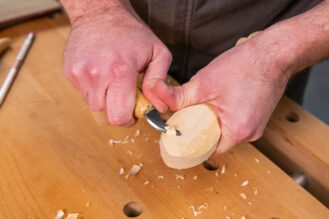
Part 6 - Whittle your love spoon
The next stage is to whittle the shape with knives. Be sure to round off the hard edges.
You may wish to leave the back flat as love spoons are traditionally hung on a wall. Or you can round off the back to give the spoon more shape, as we did.
Part 7 - Sand and finish
The last stage is to hand sand the spoon. Work your way through the grits to produce a smooth surface.
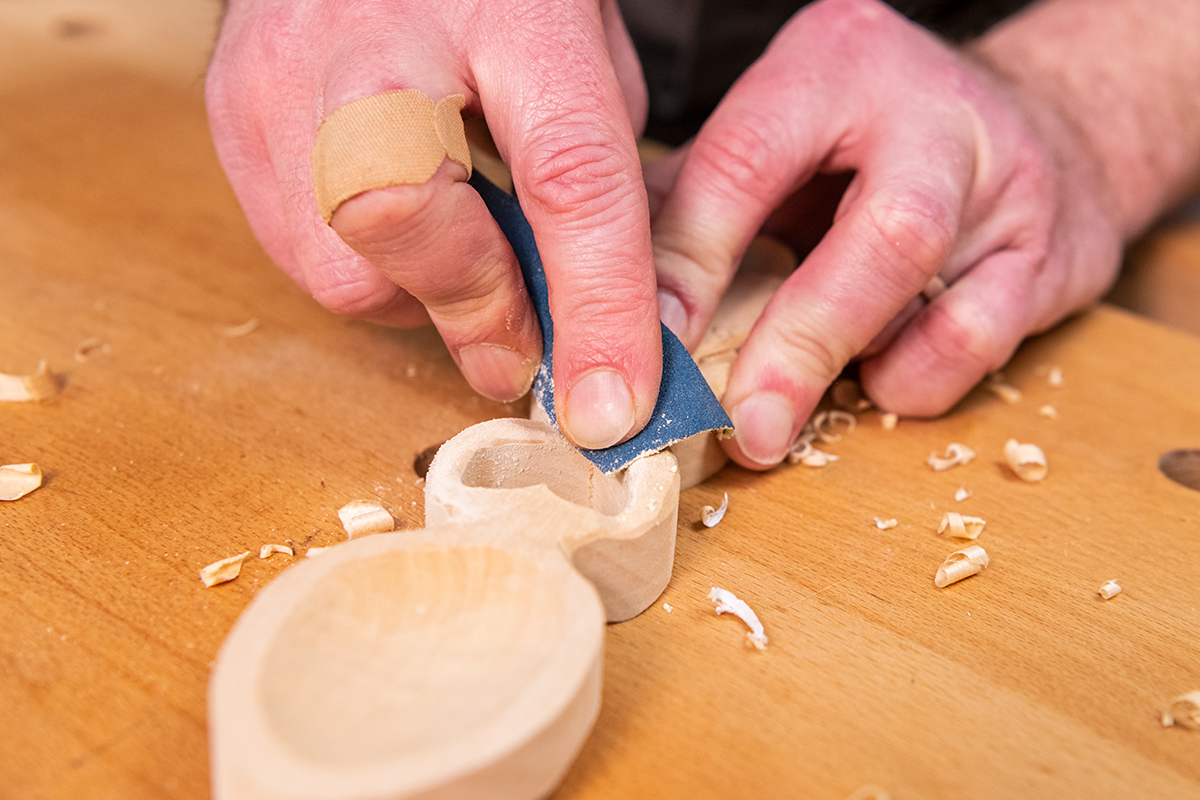
Finally, use your finish of choice. Brush on oil generously and wipe off the excess. In our example, we used Liberon finishing oil. The oiling process may raise the grain and give it a woolly feel. If this is the case, simply give a light sand again using 400g abrasive then apply the last thin coat of oil.

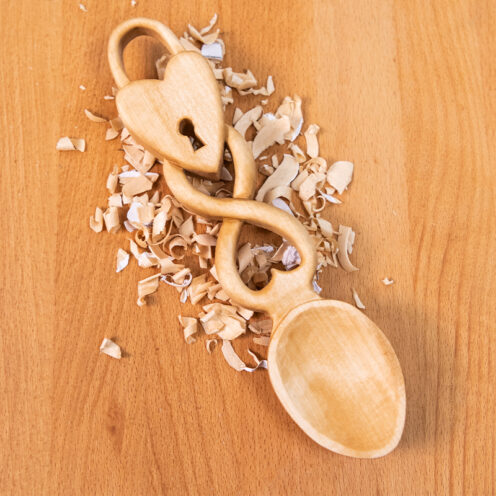
Your love spoon is now complete!
Discover more…
If you’ve enjoyed reading this article, why not take a look at more of our woodworking projects? With projects and top tips, you'll be spoilt for choice when it comes to deciding what to make next!
Alternatively, why not take a look at our range of Beat The Boredom projects? Ideal for children and adults alike, there's lots of fun and creative projects to explore!


That looks fantastic. I will have a go once I get my Axminster scroll saw out to Spain where I now live…how I miss High Wycombe Axminster store….
Hi Jules, hope it doesn't take too long to get your scroll saw relocated! Have fun making it and let us know how you get on. Kind regards, Hannah
How thick is the timber. From pictures it looks about 15m/m
Hi Brian,
We started off with a blank around 20mm thick, which ended up being around 15mm once we carved the back and shaped the piece.
Hope this helps,
Lisa
Thanks for answering my question